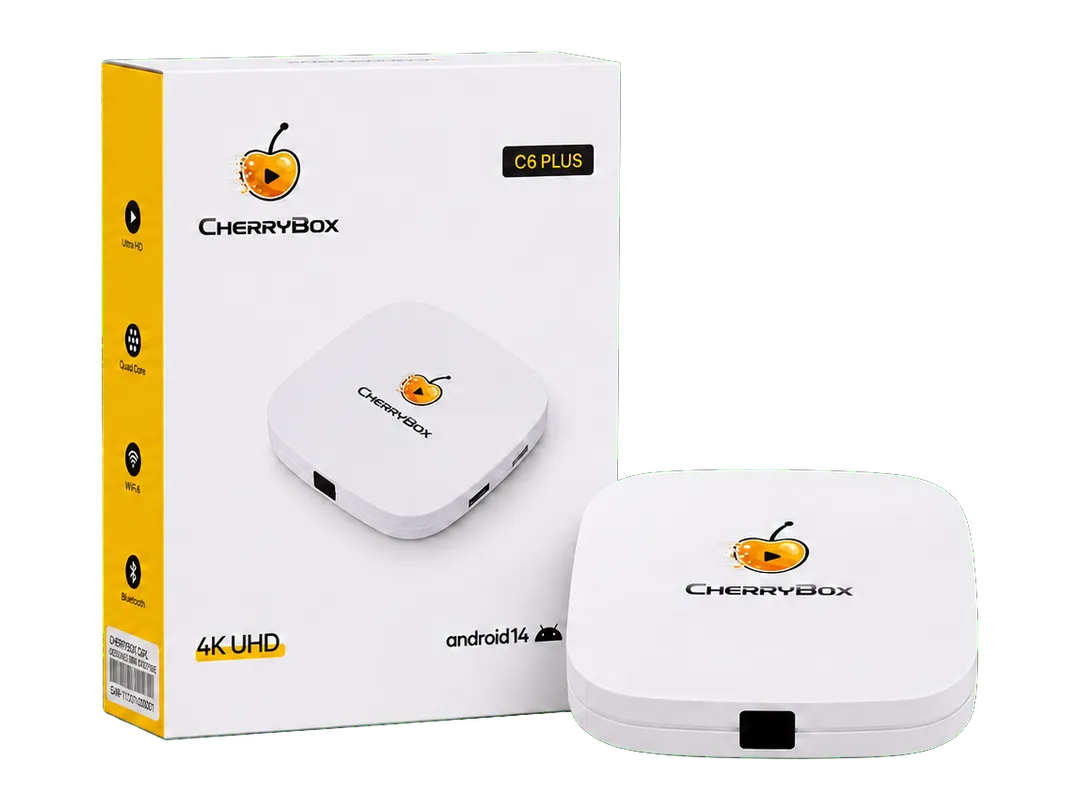
Set Up Your CherryBox C6 Plus.
Follow the steps to connect C6 Plus to your TV and internet. Learn how to use the remote, or jump to the step you need.
No CherryBox account or activation code needed.
Before You Start
A few things to have within reach.
Included in the Box
- C6 Plus
- Power Adapter
- HDMI Cable
- Bluetooth Voice Remote
- User Manual
Have These Ready
- A TV with an available HDMI input
- A nearby power outlet
- Internet access and your Wi-Fi password, or an Ethernet cable
- 2 AAA batteries
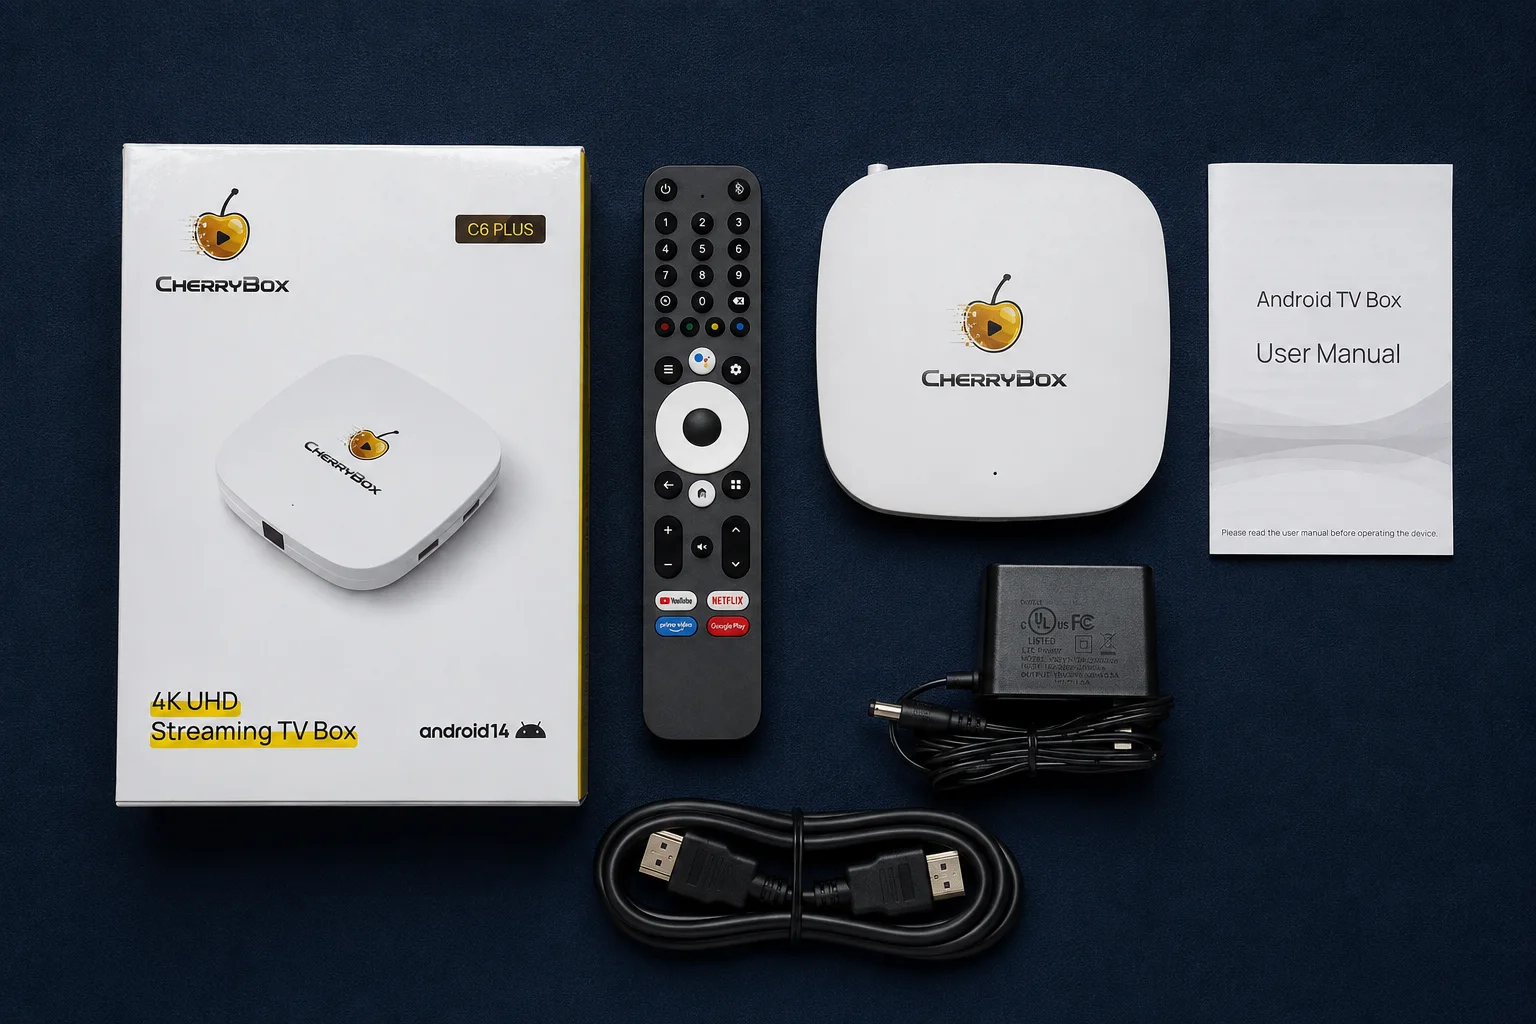
Place C6 Plus flat in a dry, well-ventilated area, away from heat. Keep the top clear and use the included power adapter.
Connect in Three Steps
Keep the TV remote nearby to select the correct input.
Connect HDMI
Connect the included HDMI cable from C6 Plus to an available HDMI input on your TV. Note its number, such as HDMI 1.
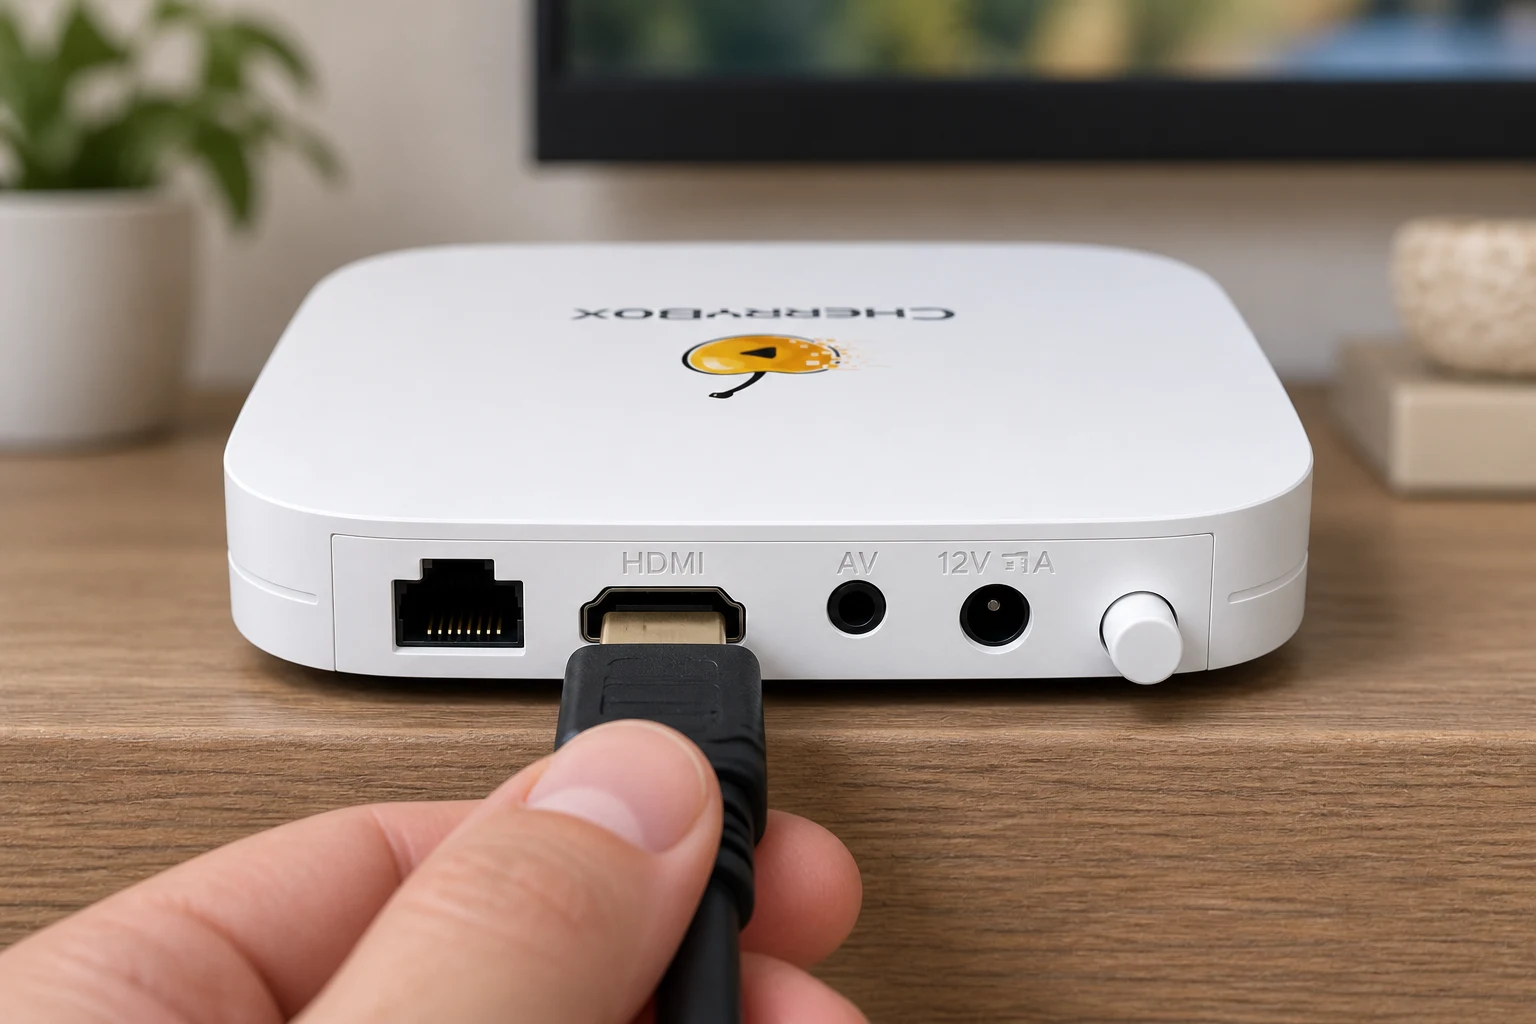
Open image for a closer look Connect HDMI to C6 Plus.
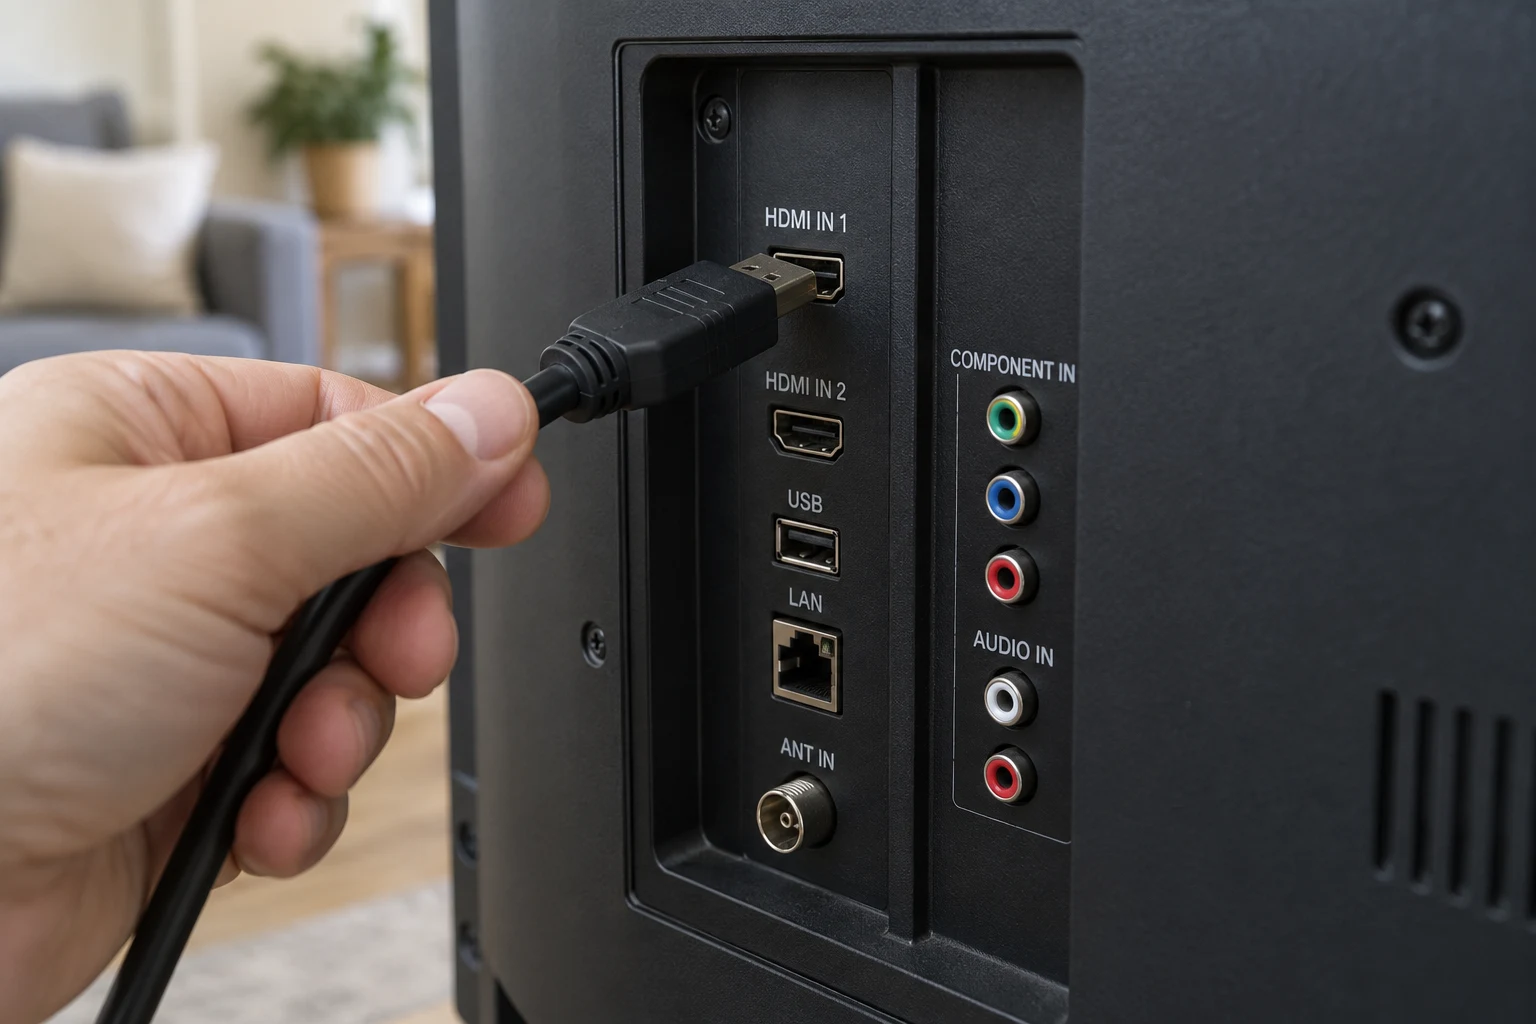
Open image for a closer look Connect the other end to an HDMI input on your TV.
Connect Power
Connect the included power adapter to the C6 Plus DC port, then plug it into a power outlet.
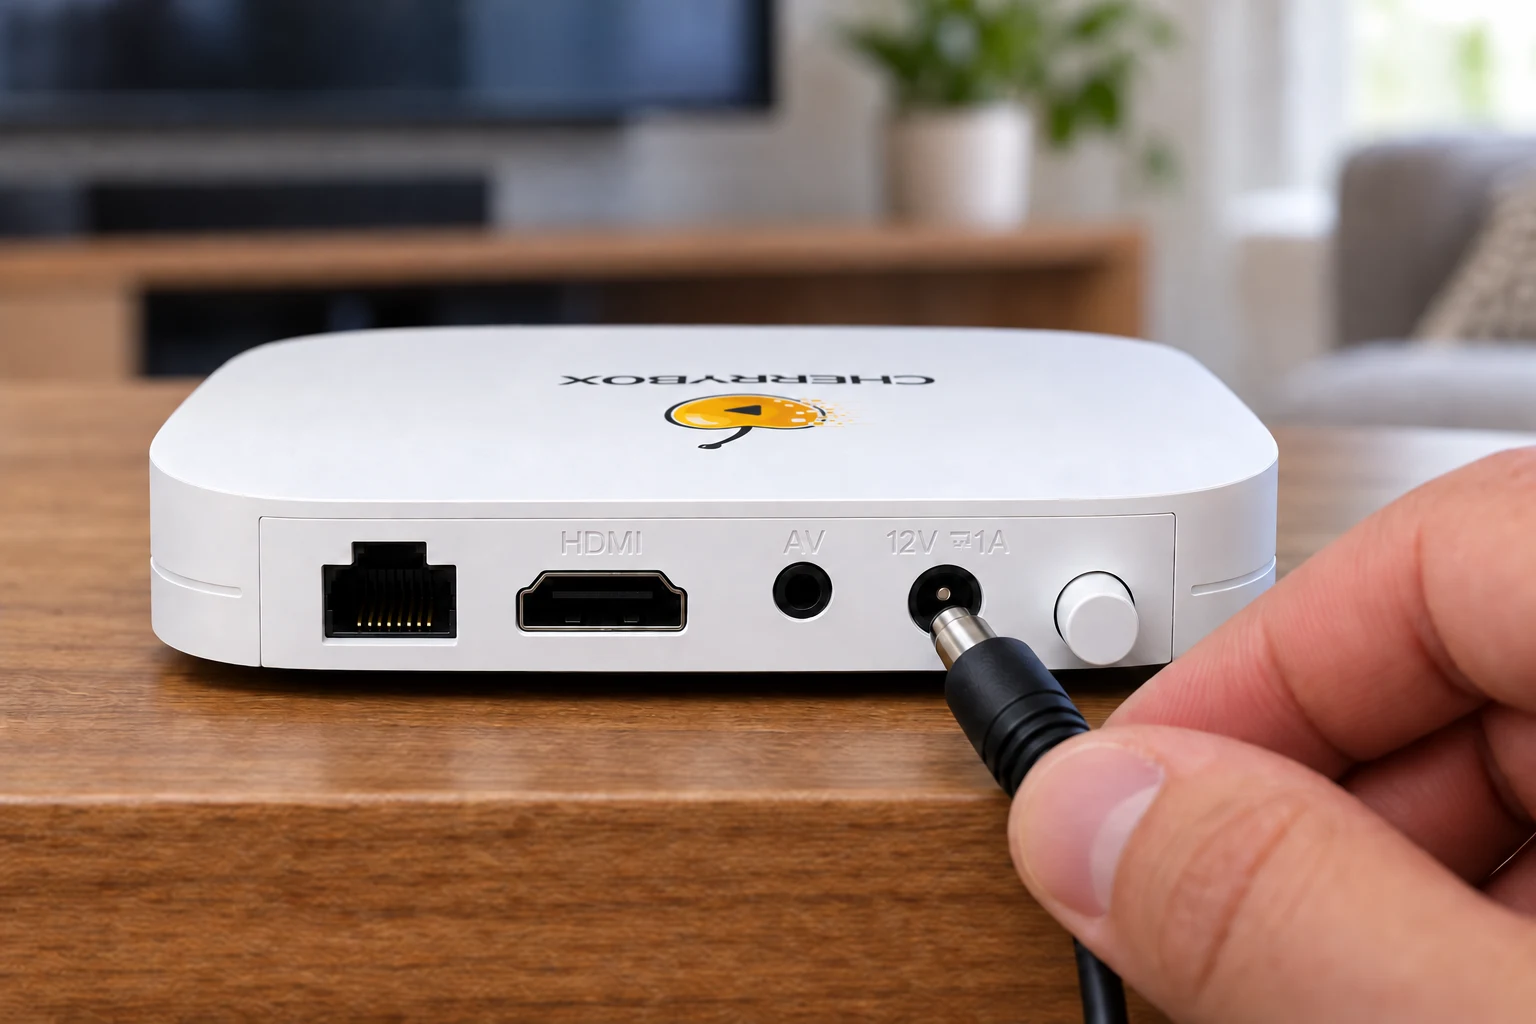
Open image for a closer look Connect the adapter cable to the DC power socket.
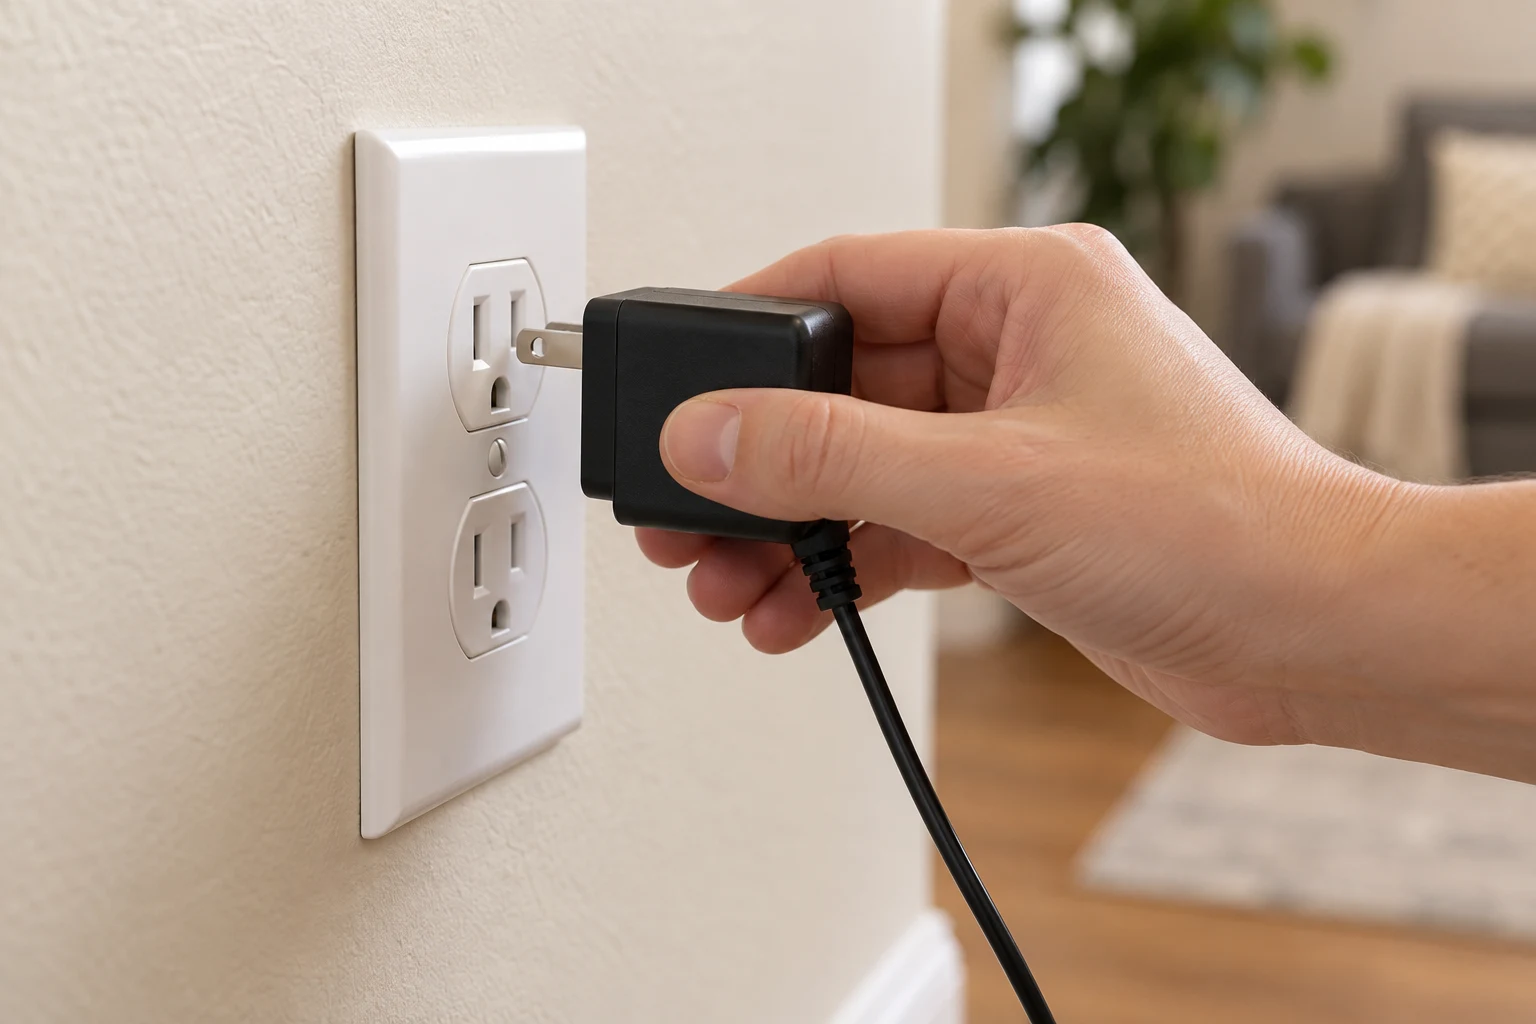
Open image for a closer look Plug the included adapter into a power outlet.
Choose Your Internet Connection
Use Wi-Fi during setup, or connect an Ethernet cable from your router to the C6 Plus LAN port.
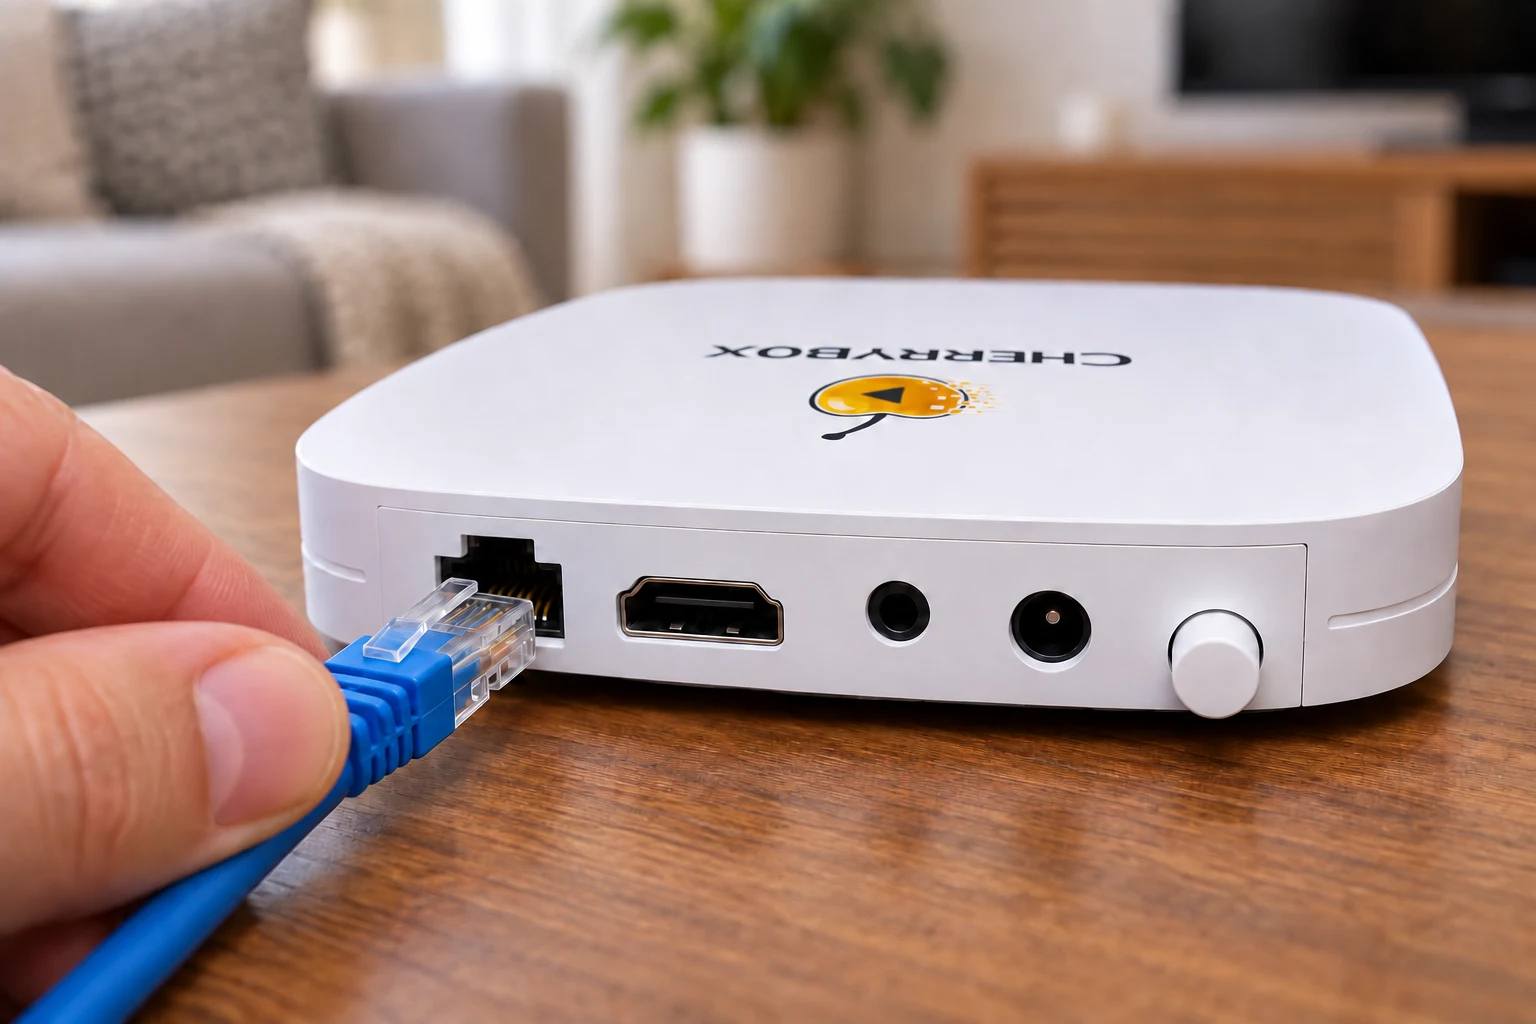
Open image for a closer look Optional: connect Ethernet to the C6 Plus LAN port.
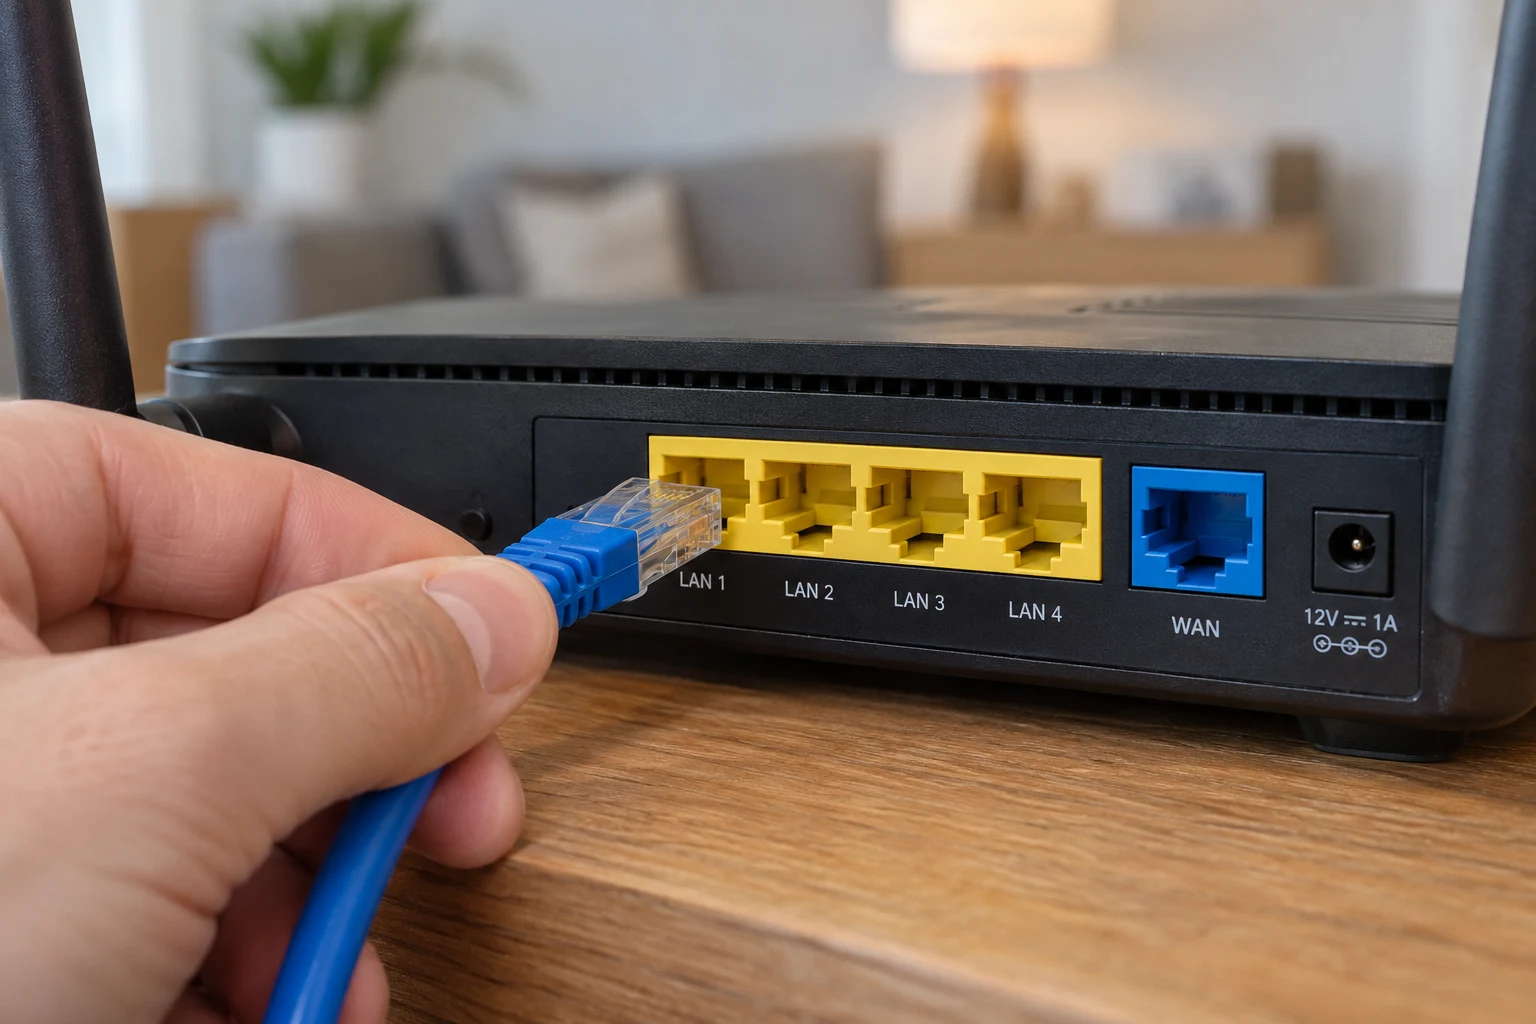
Open image for a closer look Connect the other end to a LAN port on your router.
Use your TV remote to select the HDMI input connected to C6 Plus.
Use 5GHz Wi-Fi with a strong signal near the router. Try 2.4GHz when farther away, or Ethernet for a direct wired connection.
Start Your C6 Plus
After connecting power, press the power button once to turn on C6 Plus. Follow the guide on your TV, or open the full walkthrough below.
Hide the Setup Guide
Pair Your Remote
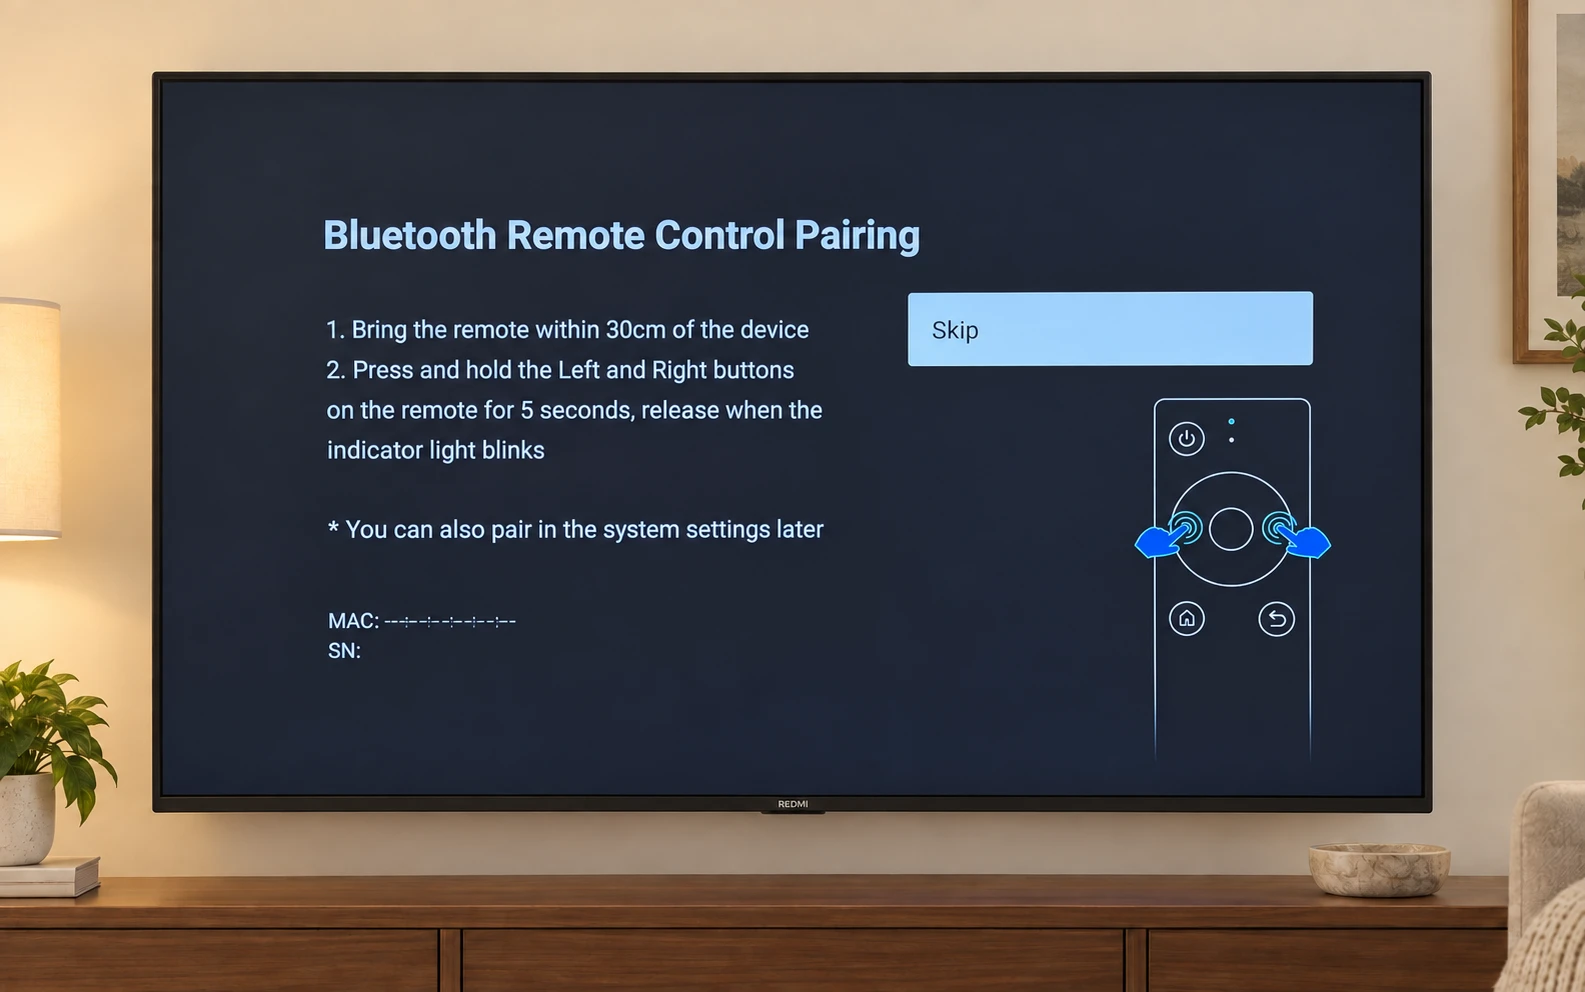
Bring the remote within 30 cm of C6 Plus. On the pairing screen, hold the Left and Right direction buttons together for 5 seconds, then release when the indicator light blinks. If you skipped pairing, press the voice button to pair it automatically.
Connect to the Internet
If the Network screen says Network not connected, select Setup. For Wi‑Fi, turn it on, choose your own network and enter its password. Look for Connected under the network name. If Ethernet is already connected, continue without setting up Wi‑Fi.
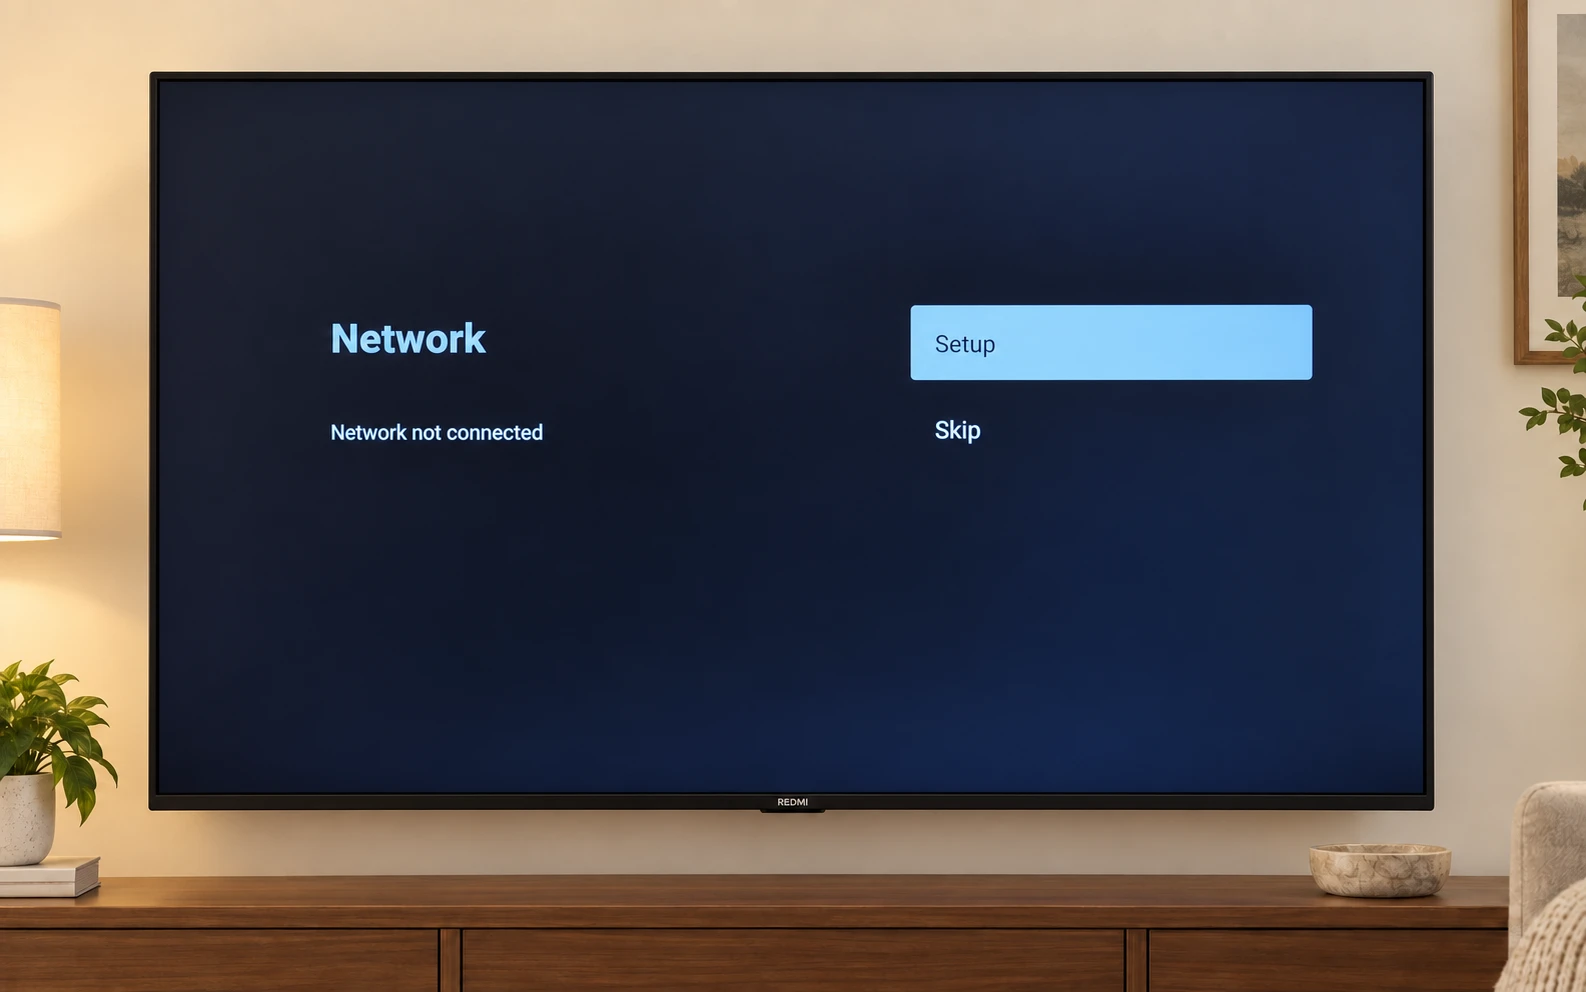
Open image for a closer look See the other screens for this step
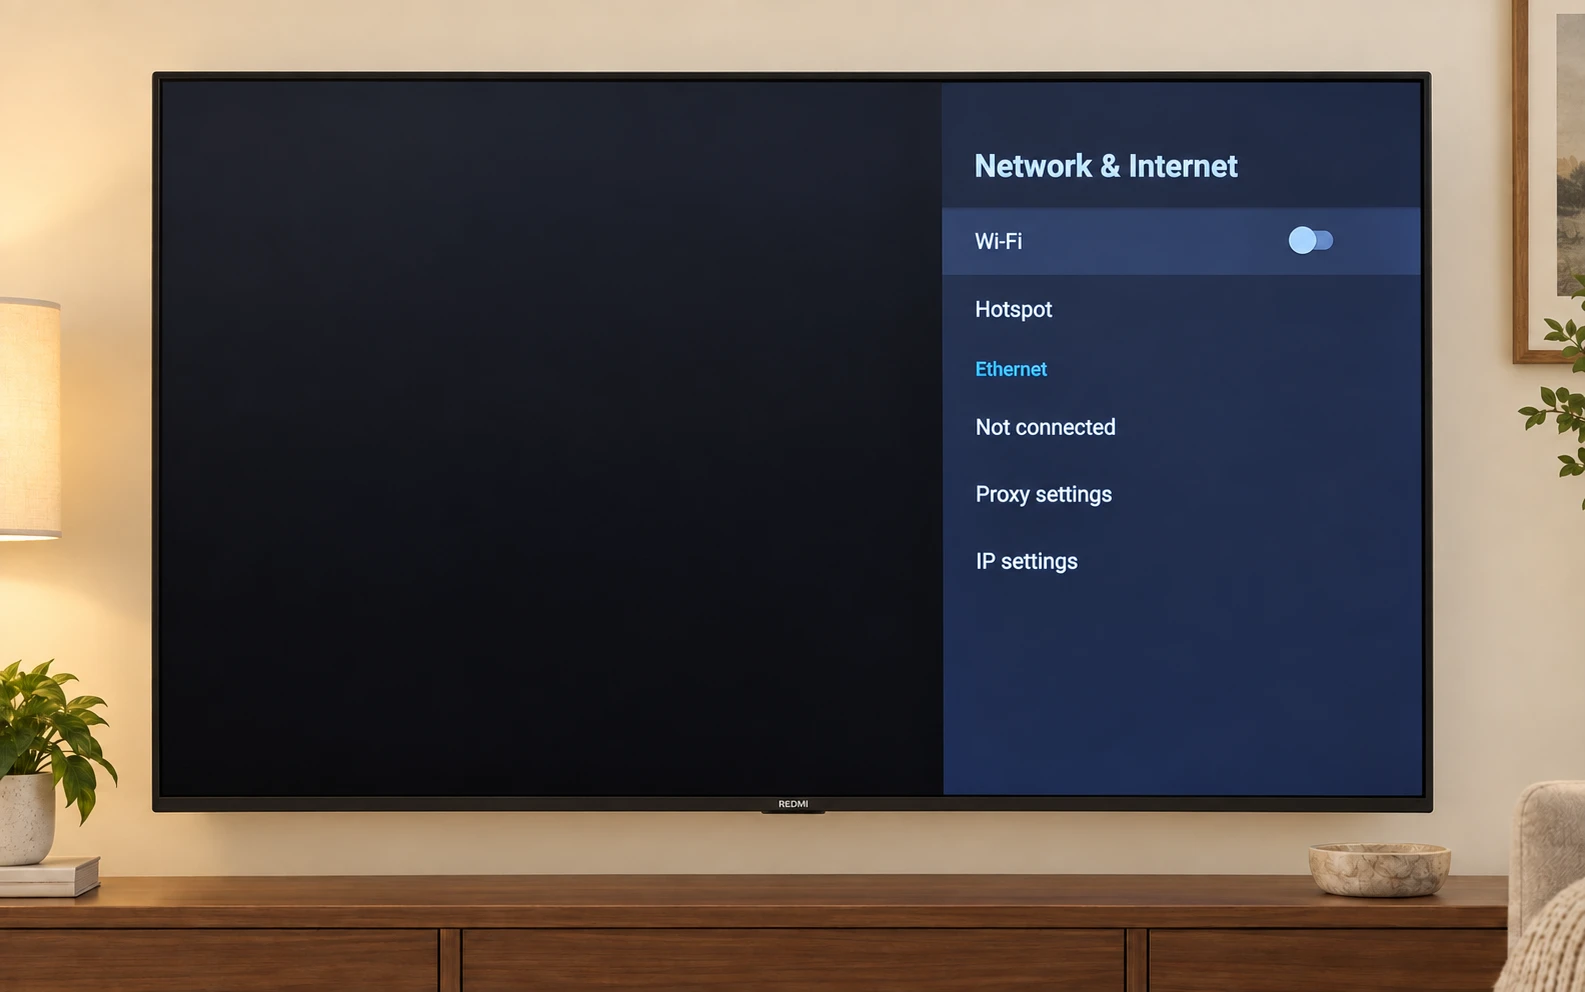
Open image for a closer look 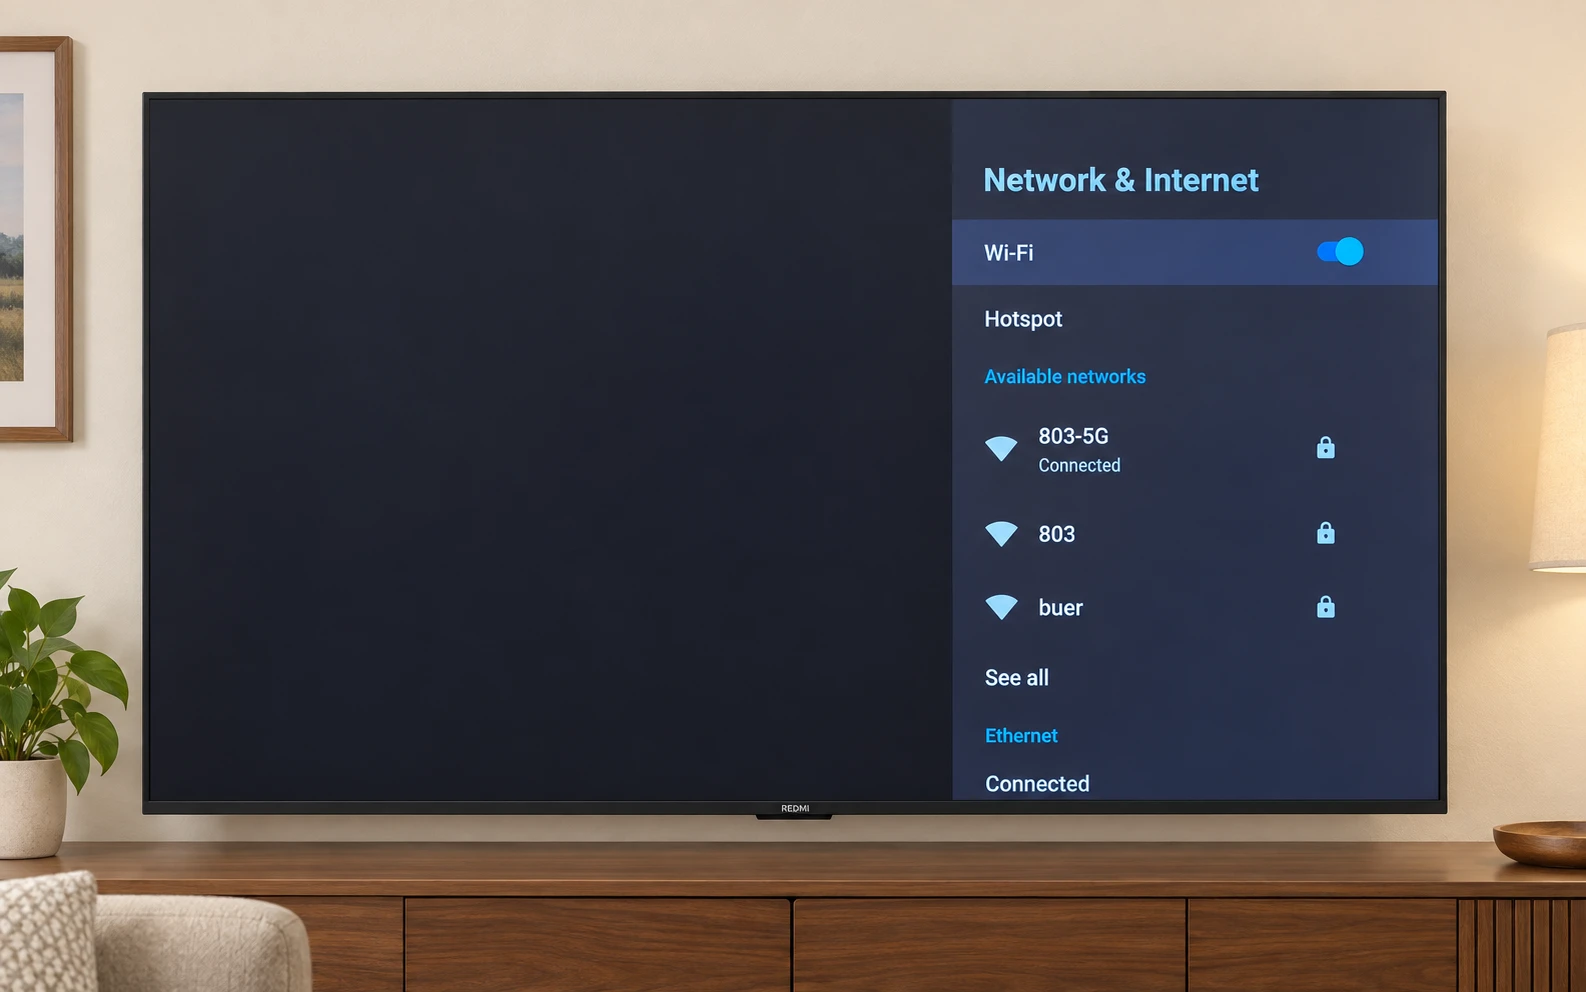
Open image for a closer look Network names shown in the picture are examples. Choose your own network.
Check the Picture Edges
If the picture is cut off at the edges, select Setup under Display Area Set. Follow the screen markers to adjust the display. The center button changes focus and Back exits. If the picture already fits, select Skip.
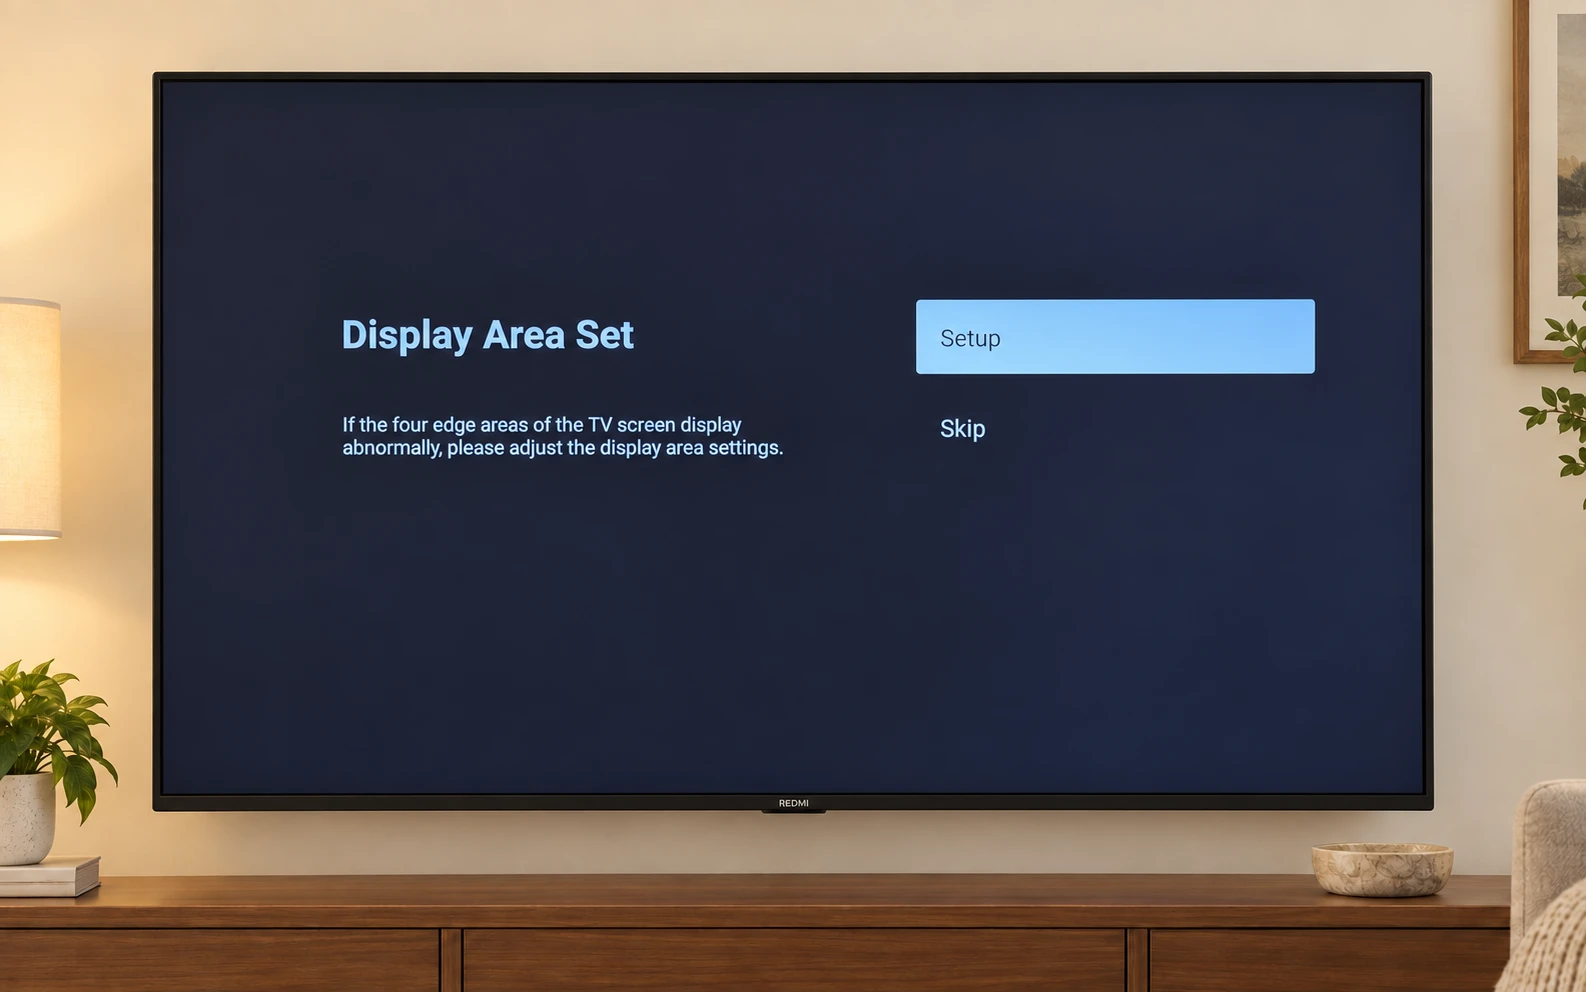
Open image for a closer look See the other screens for this step
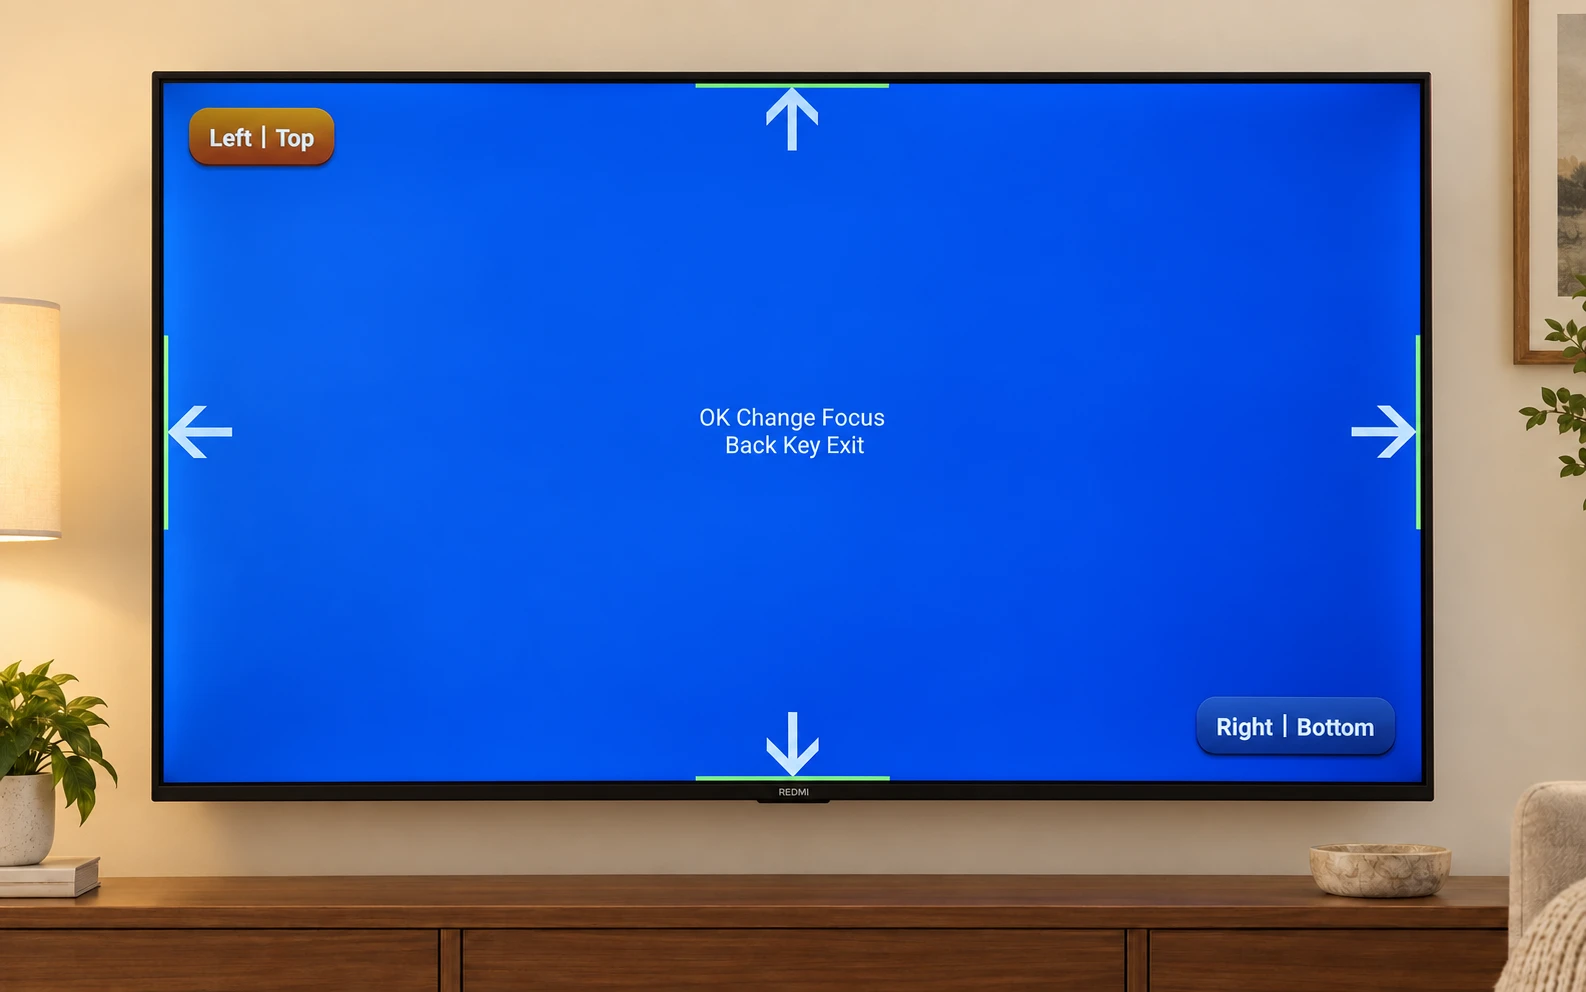
Open image for a closer look Finish the Setup Guide
Read the Disclaimer Notice on your TV and choose Agree or Reject. When you reach the Finish screen, select Finish to complete the guide.
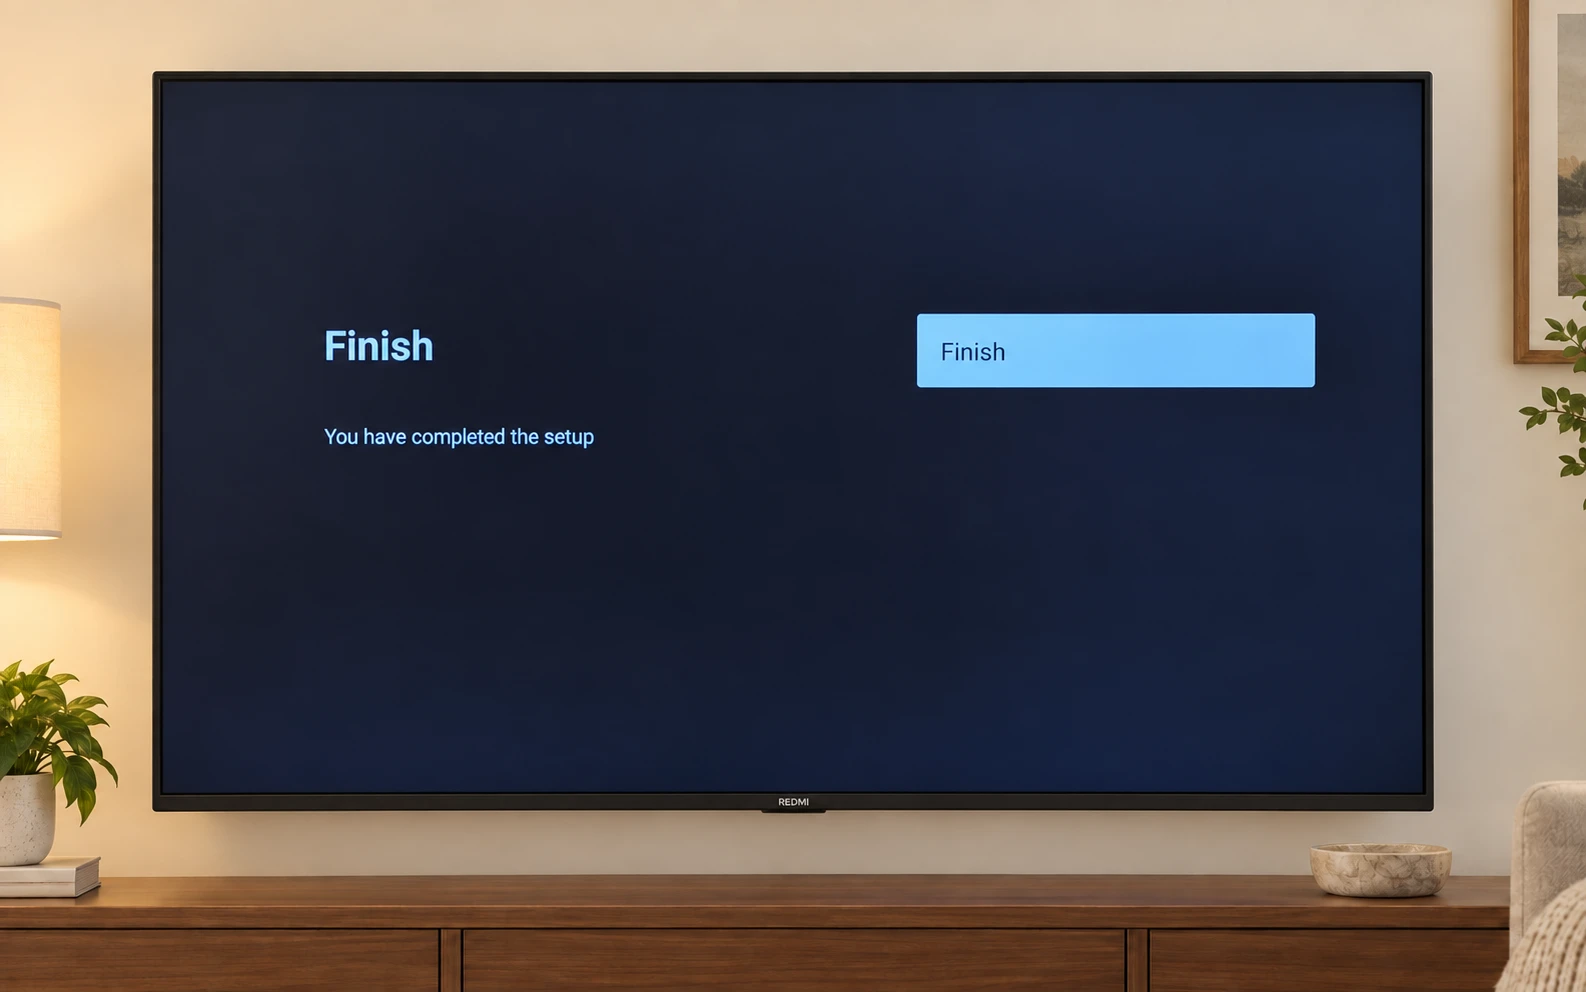
Open image for a closer look See the other screens for this step
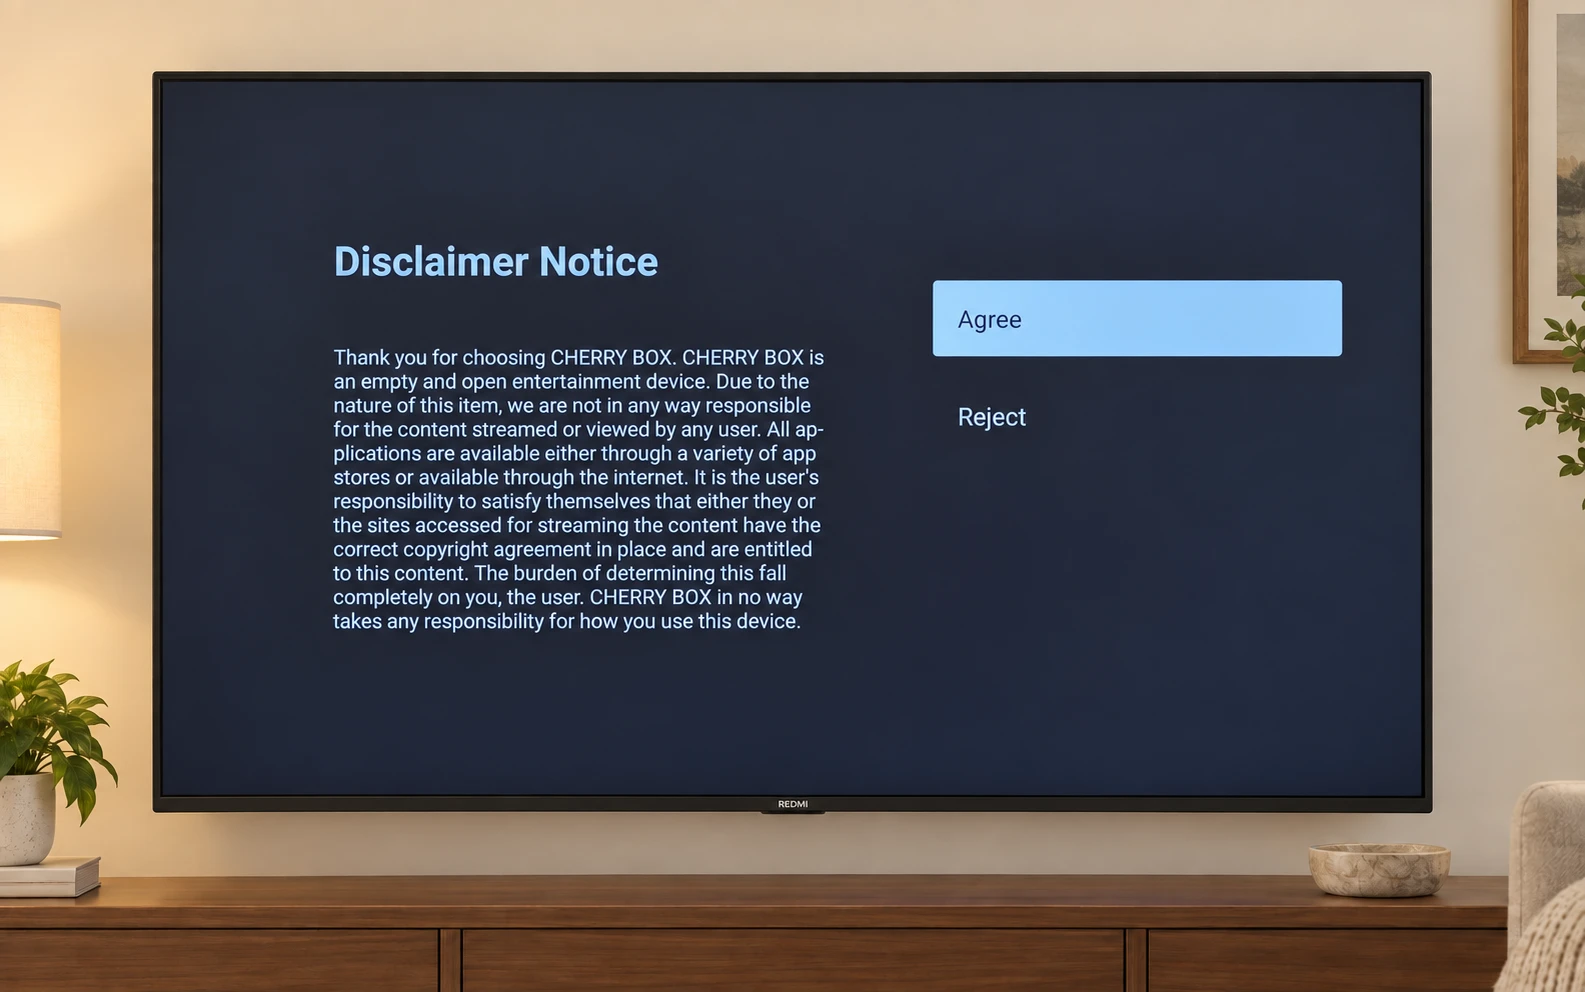
Open image for a closer look Let Your Content Appear
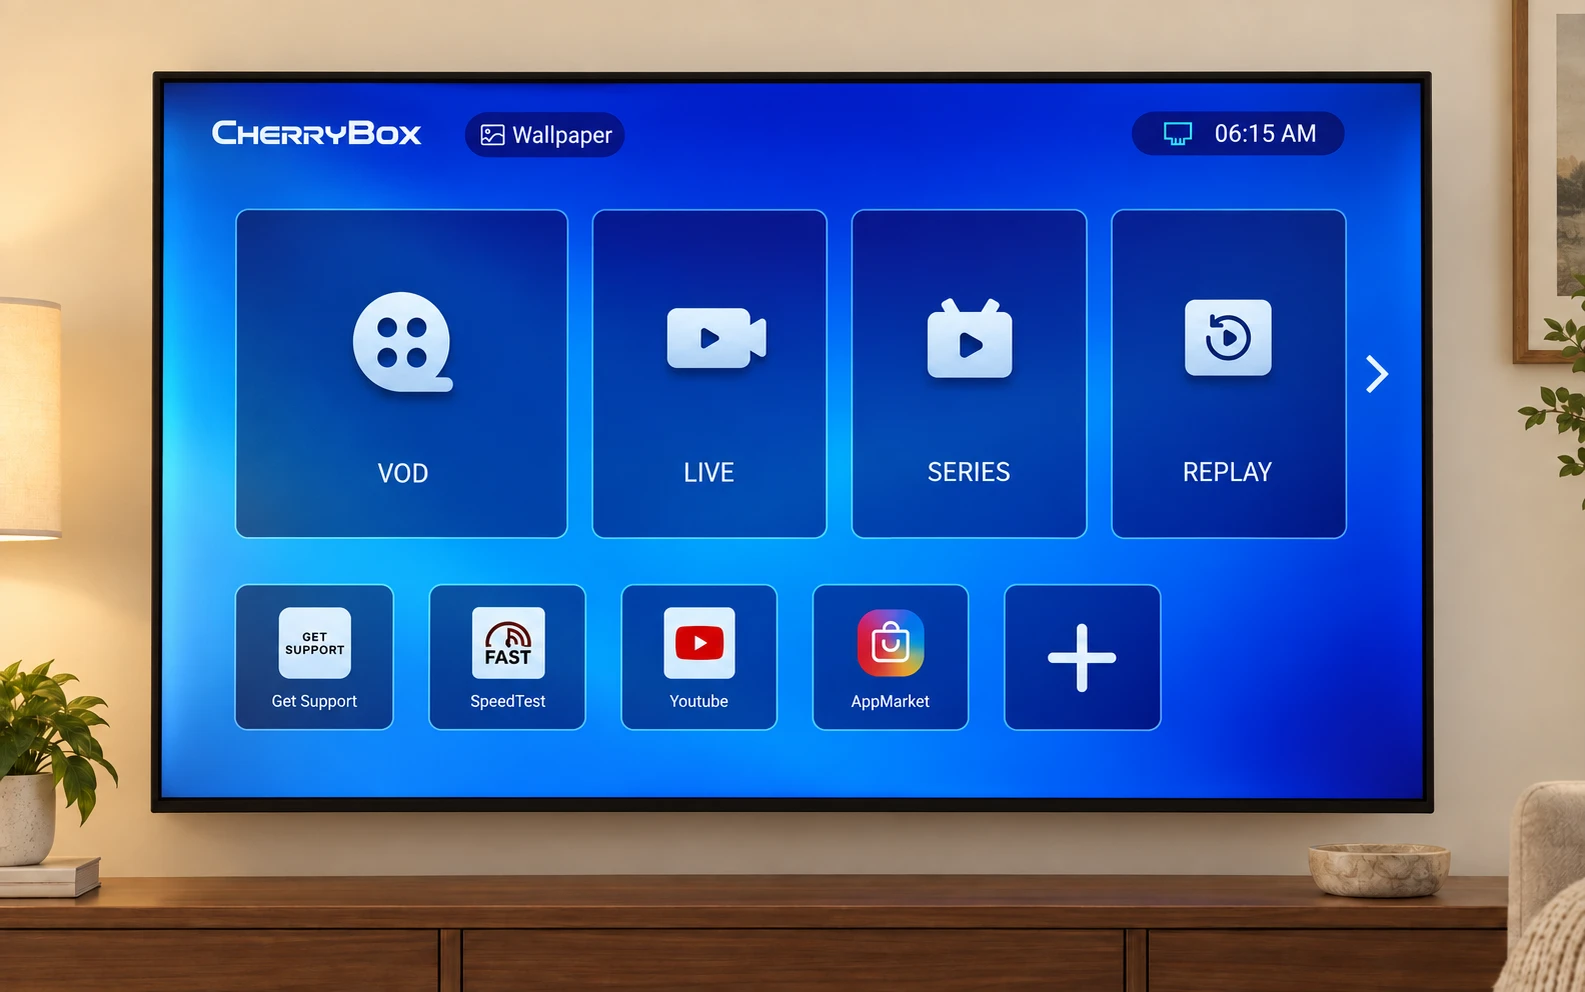
After connecting to the internet, wait a moment for the content tiles to appear automatically. Select LIVE or VOD and follow the first-time download prompt. Once the download is complete, open the app to start watching.
Open image for a closer look See the other screens for this step
Open image for a closer look
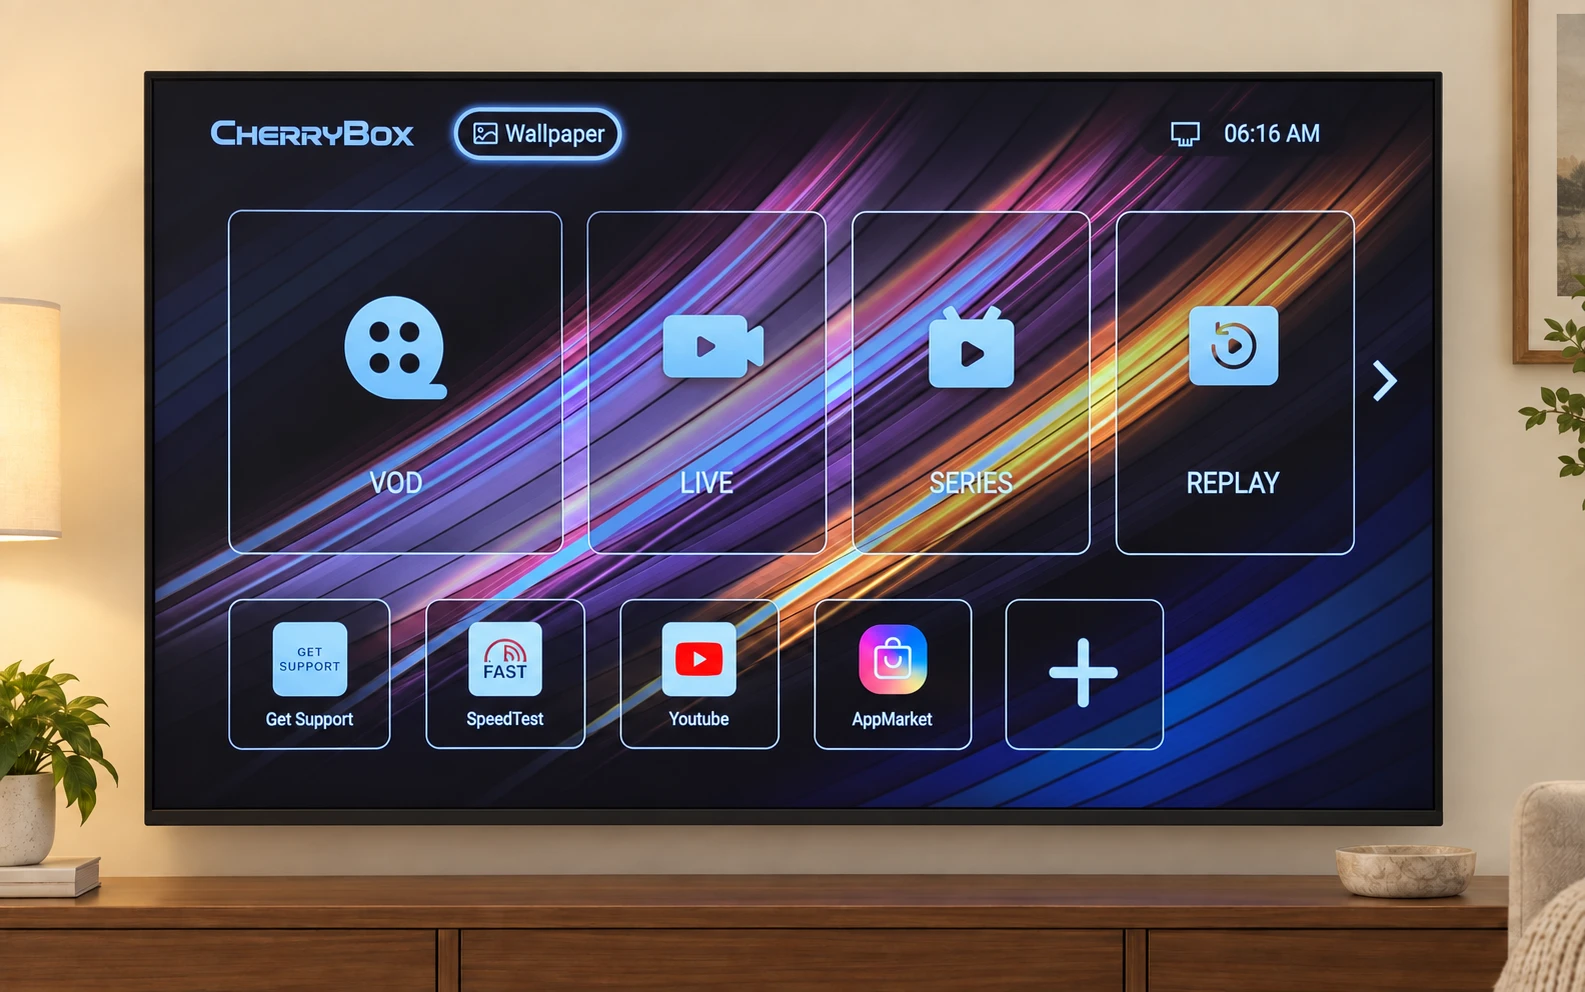
Change the wallpaper (optional)
Select Wallpaper at the top of the home screen to change the background. This does not affect your content.
Get to Know Your Remote
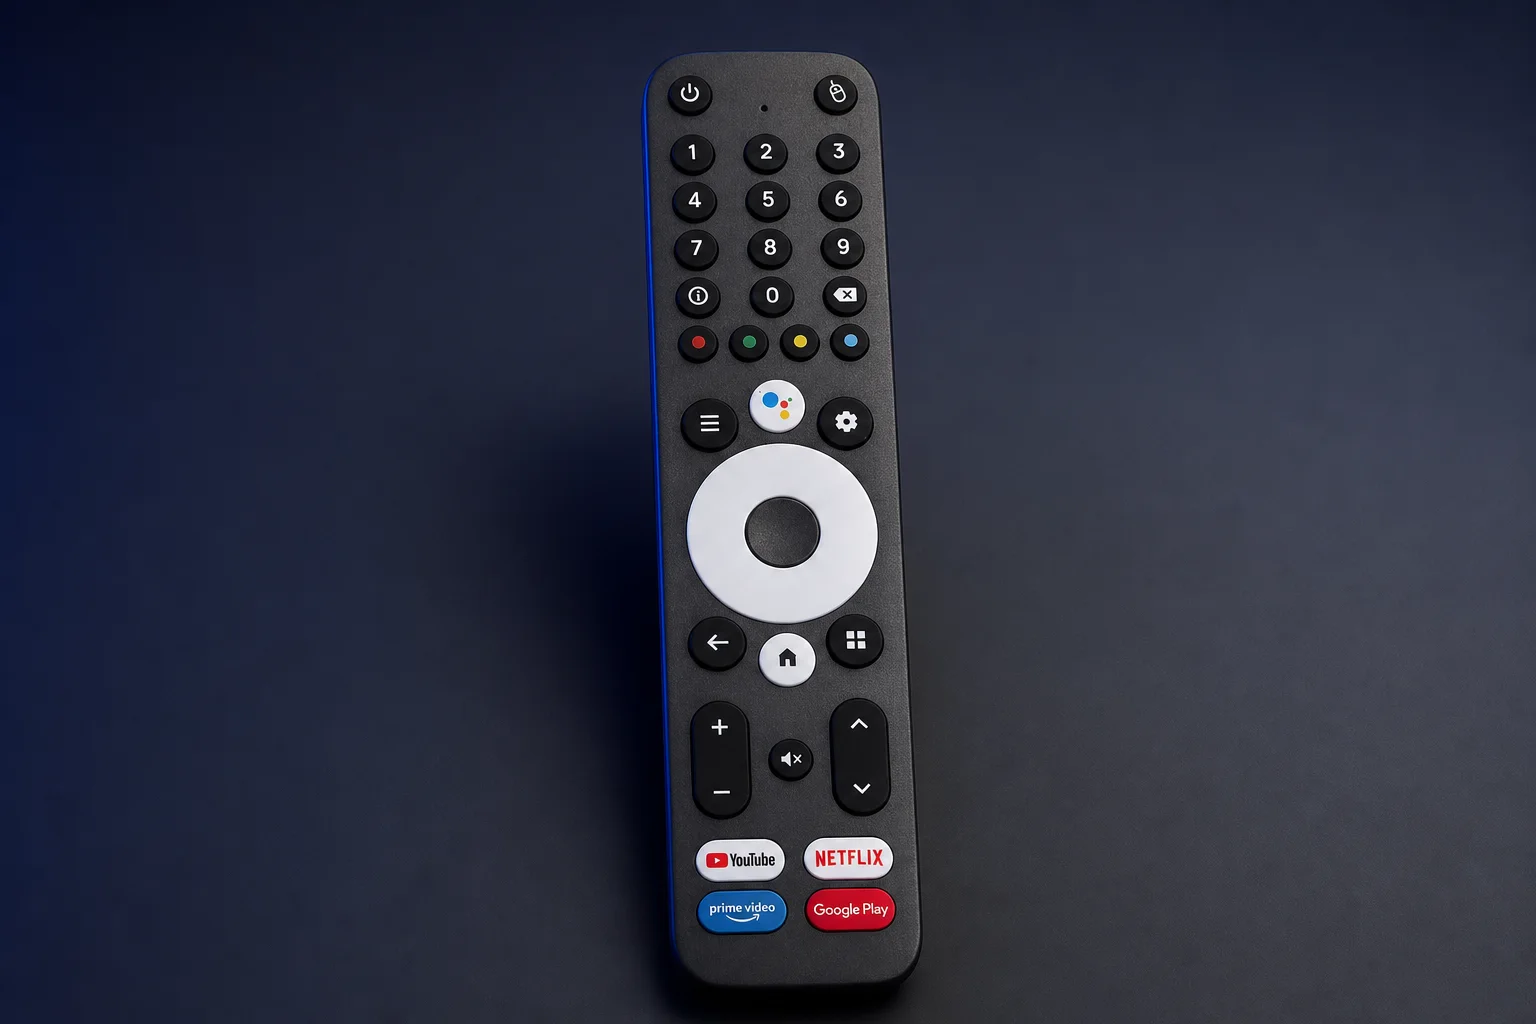
Find the buttons on the remote in your hand.
- Move and Select
- Use the directional ring to move. Press the center button to select.
- Home
- Return to the main screen.
- Back
- Go back one step.
- Volume and Mute
- Adjust the sound with + and −, or use Mute.
- English Voice Search
- Use the white voice button to search in English. If pairing was skipped, press it to pair automatically.
- Power and Other Buttons
- Find the power button at the top left. Other buttons may work differently depending on the app.
Change your network after setup
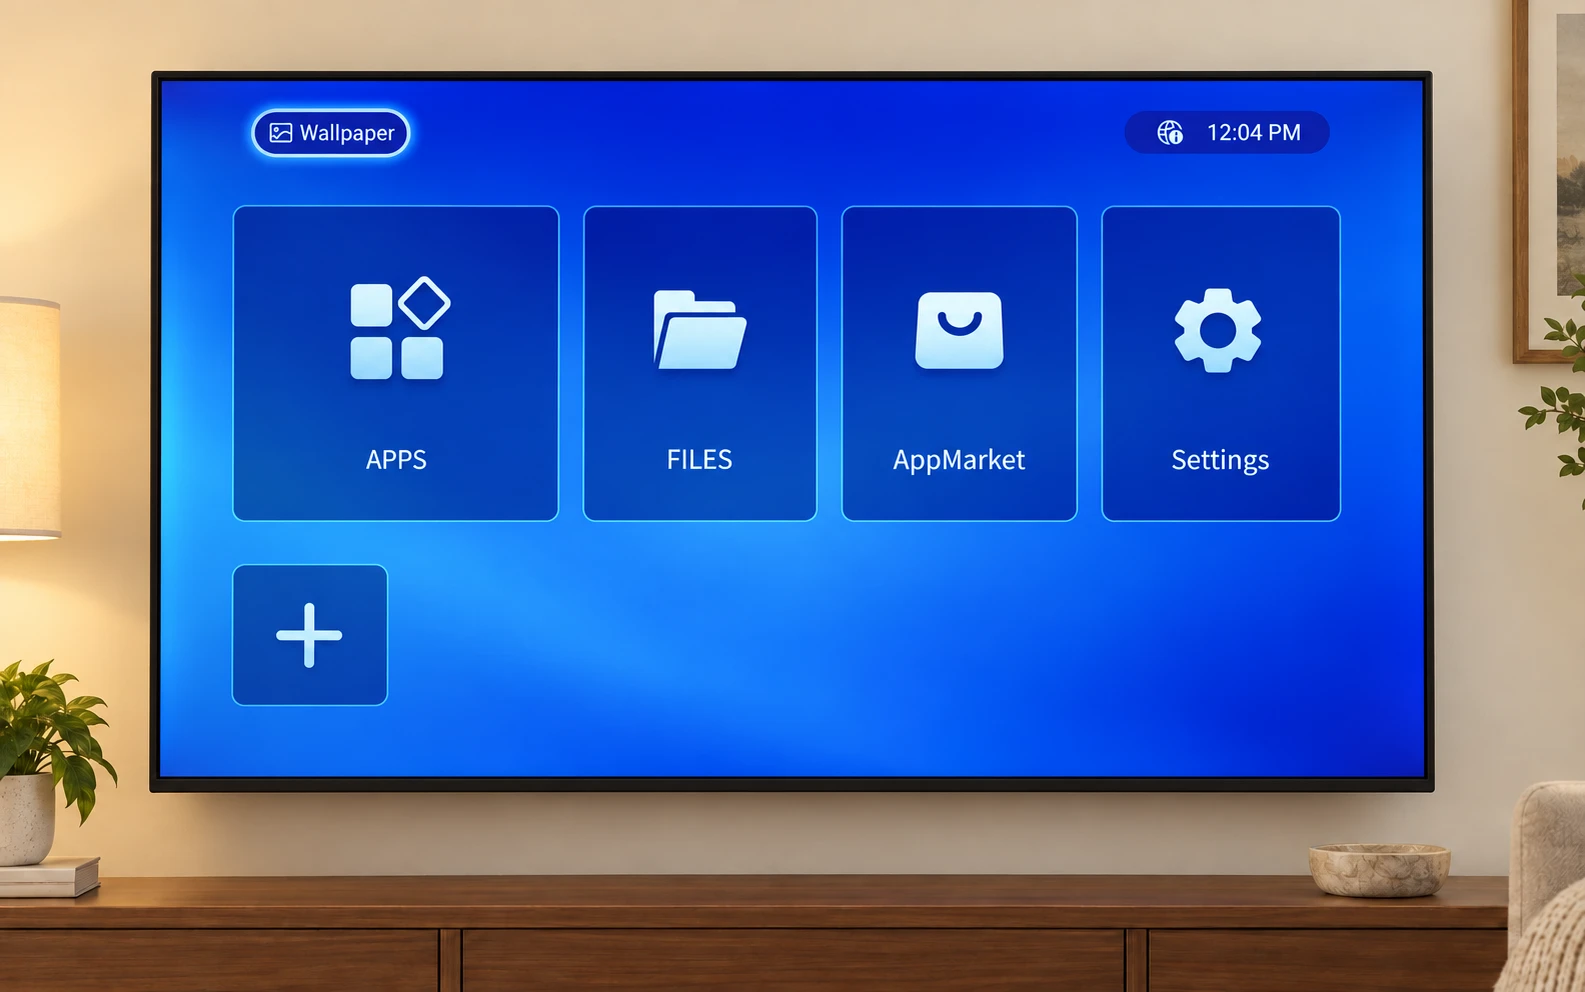
On the home screen with APPS and FILES, select the Settings tile with the gear icon. Open Network & Internet, then Wi-Fi. Choose your network and enter its password. Look for Connected.
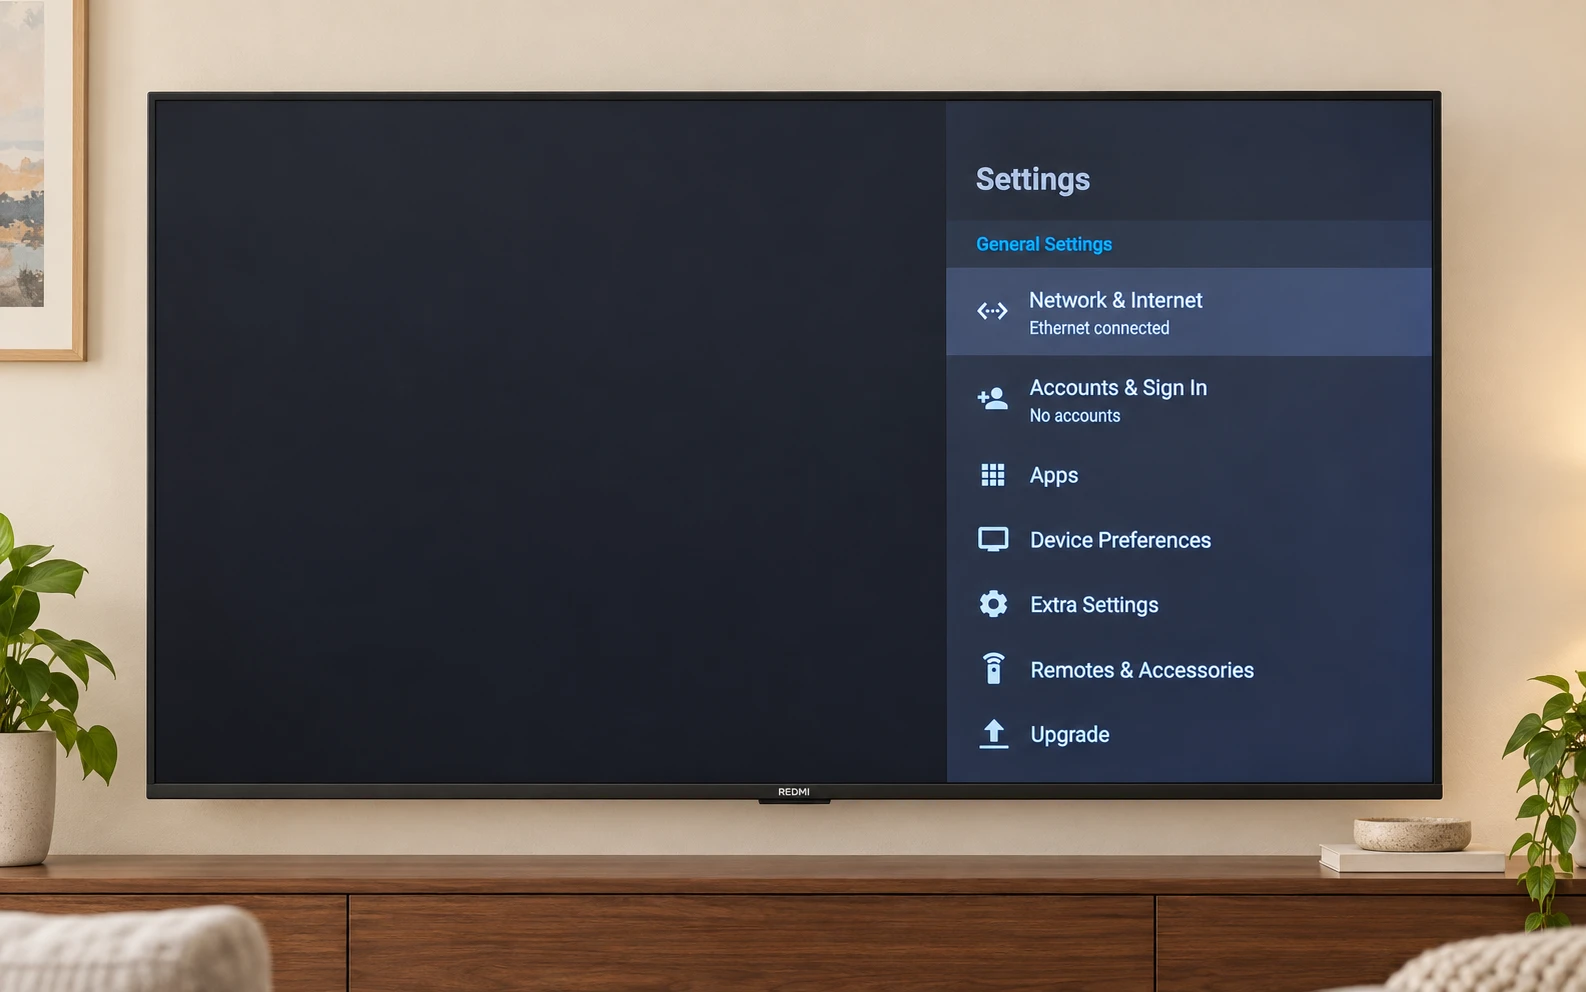
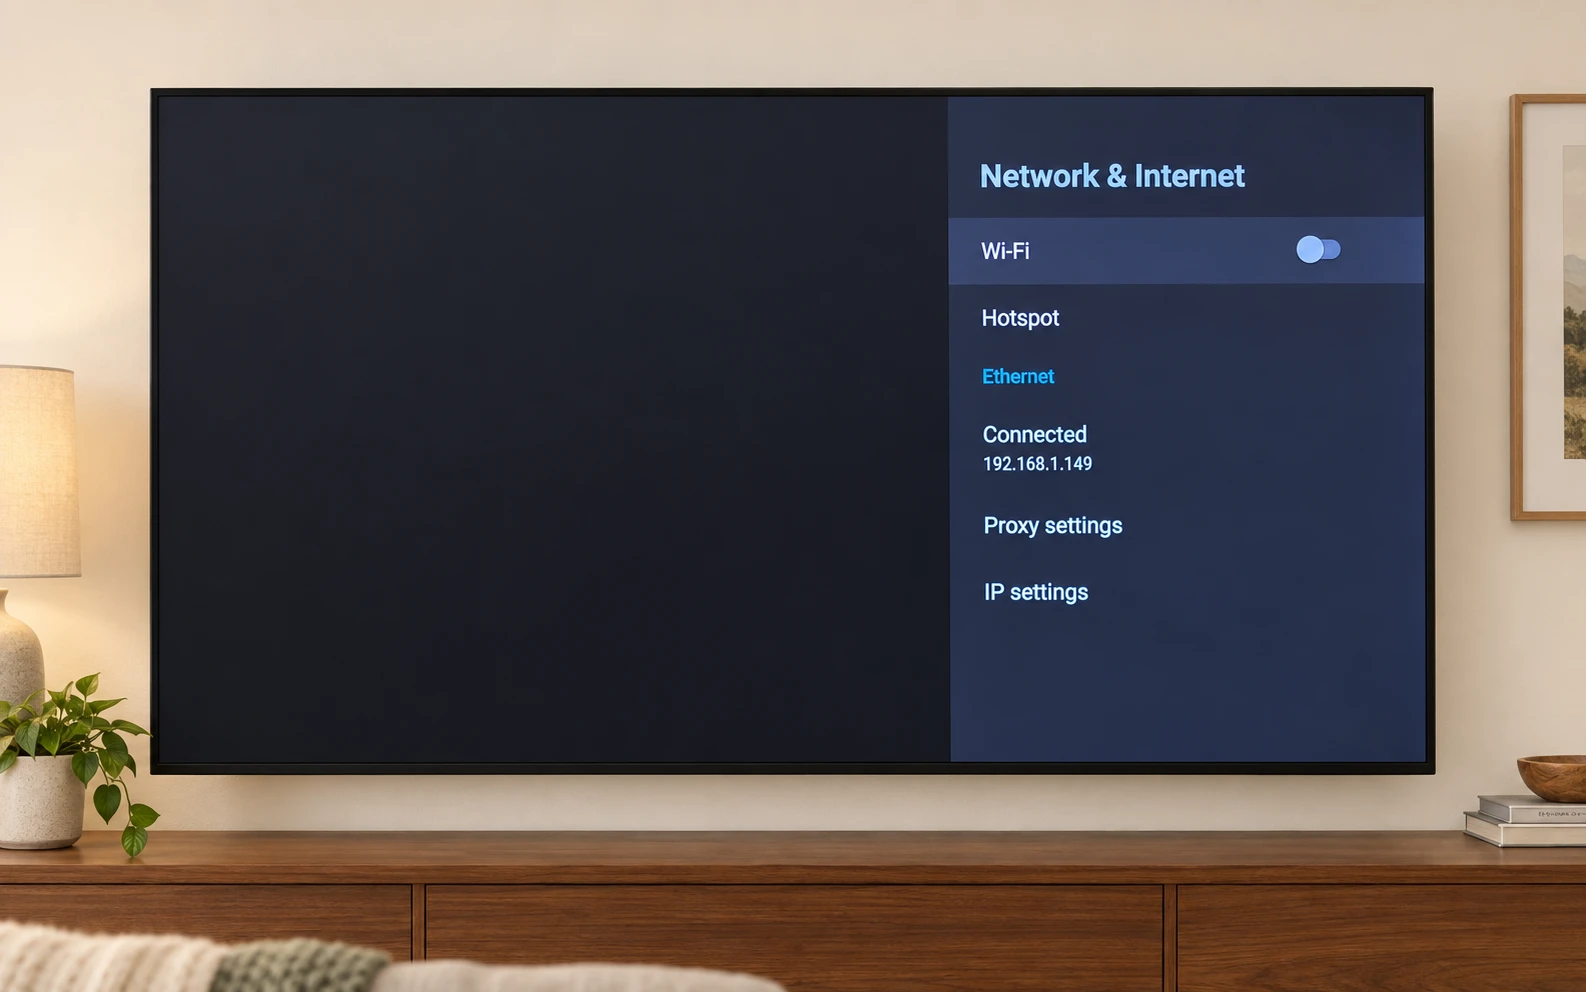
If Ethernet says Connected, you do not need to turn Wi-Fi on as well. Menu names may vary with the software version.
Find Something to Watch
Once connected, wait a moment for the content tiles to appear automatically.
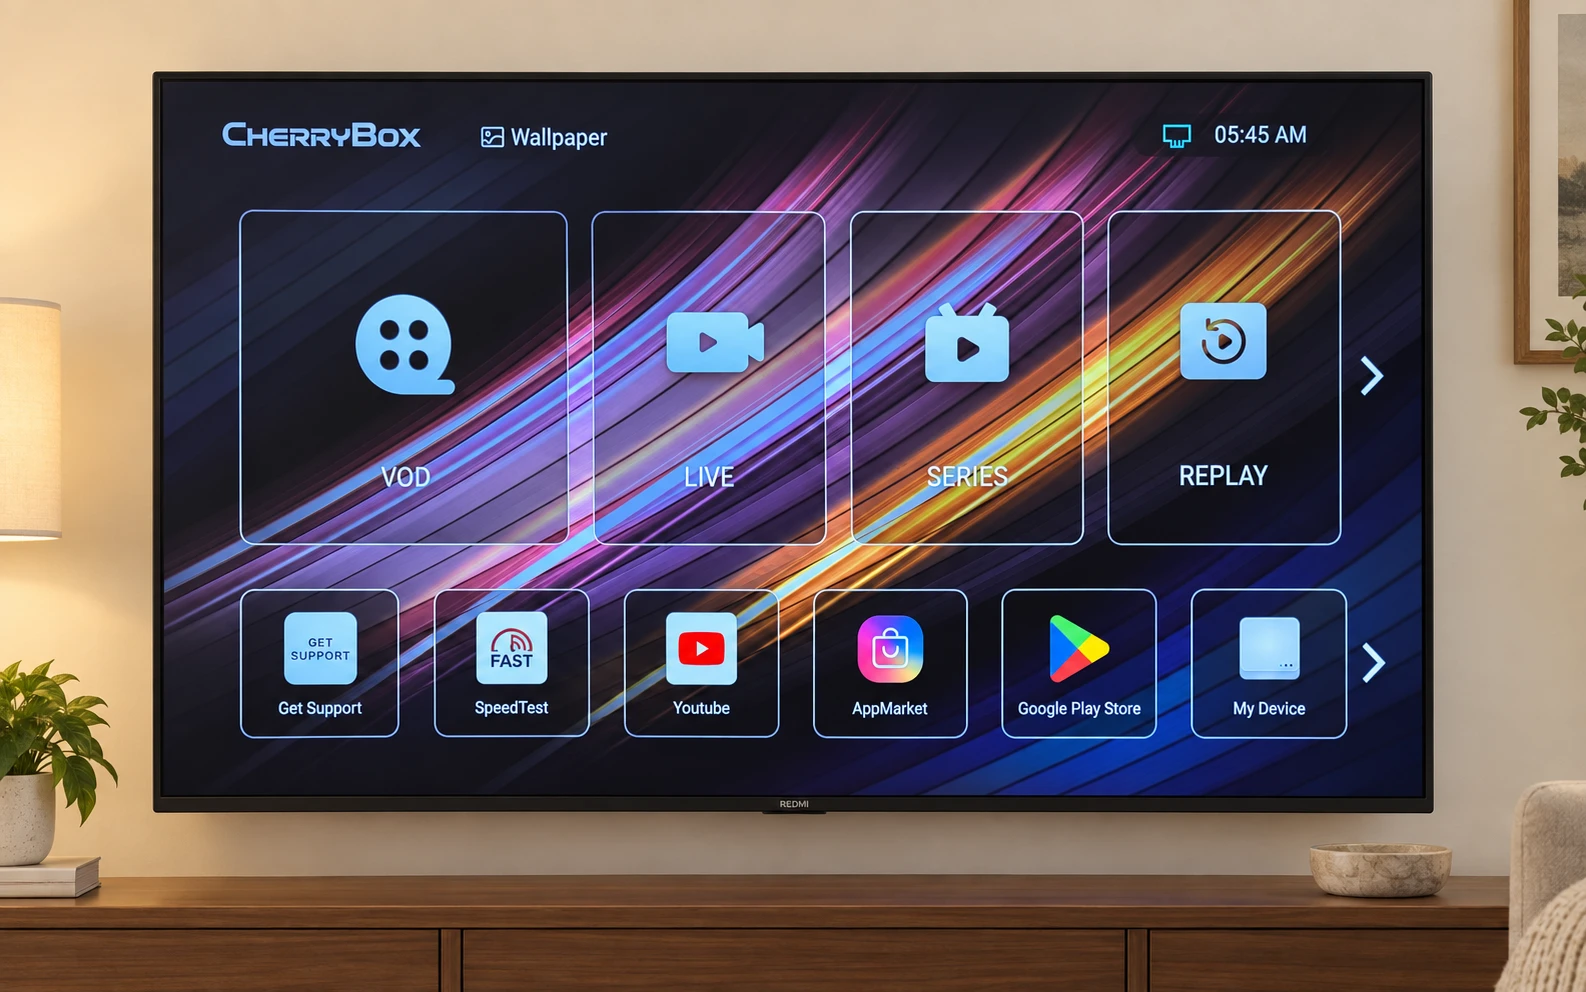
Use the directional ring to highlight an entry. Press the center button to open it.
The first time you open LIVE or VOD, follow the on-screen prompt to download the app. Once the download is complete, open the app to start watching.
Press Home to return to the main screen and choose something else to watch.
- LIVE
Watch live TV
Choose the tile with the video‑camera icon.
- VOD
Browse movies
Choose the tile with the film-reel icon.
- SERIES
Browse series
Choose the tile with the TV icon.
- REPLAY
Find replay content
Choose the tile with the circular‑arrow play icon.
Catch-Up TV lets you watch programs you missed. Time-Shift lets you pause or rewind live TV, and Restart lets you start a live program from the beginning.
Ready to Watch?
Check the result, not just the connections.
Common Questions & Troubleshooting
Find an answer or a quick check for the issue you are seeing.
No Picture
Check that C6 Plus is connected to power and turned on. If it is off, press the power button once. Use the TV remote to select the matching HDMI input. Check that both ends of the HDMI cable are secure.
Remote Not Responding
If none of the buttons respond, check the batteries, their direction and whether C6 Plus is on. If basic controls work but pairing was skipped, press the voice button to pair automatically. Contact CherryCare if you still cannot use the remote.
Buffering or Freezing
Start by checking how much of your viewing is affected. Try another program, then another app if one is available. Note what works before changing settings on your C6 Plus.
| What you notice | What to try next |
|---|---|
| One program buffers, but others play | Note the program and time, then check it again. Tell us if it keeps happening; this alone does not show that the box is faulty. |
| Several programs in one app buffer | Compare with another app if available. Record which app is affected and whether the problem is continuous or occasional. |
| Different apps or devices have trouble | Check the connection where you watch. Pause large downloads you control, then try the same content again. |
On C6 Plus, check Settings > Network & Internet > Wi-Fi for your connection. If you can run a cable, connect the box's LAN port to a LAN port on your router and compare playback. Keep the program and test conditions as similar as you can so the comparison is useful.
C6 Plus offers dual-band Wi-Fi and 10/100 Mbps Ethernet. A wired connection can help you check whether Wi-Fi is part of the problem; it cannot fix every issue with an app or content source. A speed test on another device is not a playback test on the box.
If you cannot change the network, record the affected program or app, the time, whether you used Wi-Fi or Ethernet, and what you tried. Contact CherryBox with those details. Do not include Wi-Fi passwords or account passwords.
Cannot Connect to Wi‑Fi
Check that Wi‑Fi is turned on and the network name and password are correct. Move C6 Plus closer to the router if the signal is weak, then try again.
Picture but No Sound
Check that neither your TV nor C6 Plus is muted, and increase the volume on both. Check that the HDMI cable is secure.
Do I need an activation code or a CherryBox account?
No. C6 Plus does not require an activation code or a CherryBox account. Content tiles appear automatically after connecting to the internet.
What internet connection do I need for 4K?
We recommend a stable connection of at least 25 Mbps for 4K streaming. Playback also depends on the content, your TV and your home network.
CherryCare · 24/7 Support
Need a Hand?
CherryCare provides 24/7 help with setup, the remote, networking and playback.
Tell us which step you are on and what you see on your TV.
CHERRYBOX C6 PLUS
One Box.One Payment.More to Watch.
Bring home 3,420 channels and programs, plus 10,000+ movies and TV shows in one easy‑to‑use box. Pay once, with no monthly fees.